Showing posts with label dress guards. Show all posts

Saturday, 29 January 2011

Barter Economy

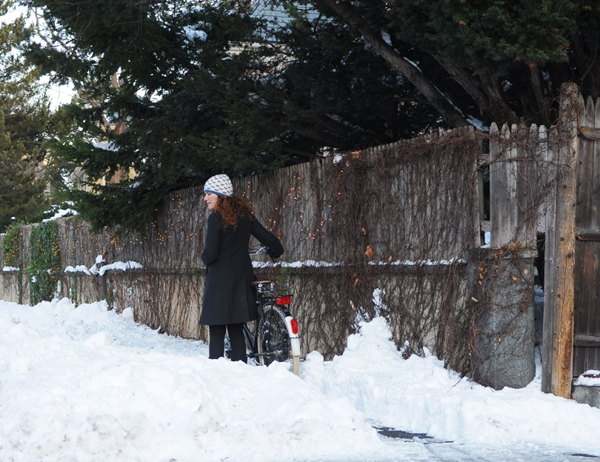
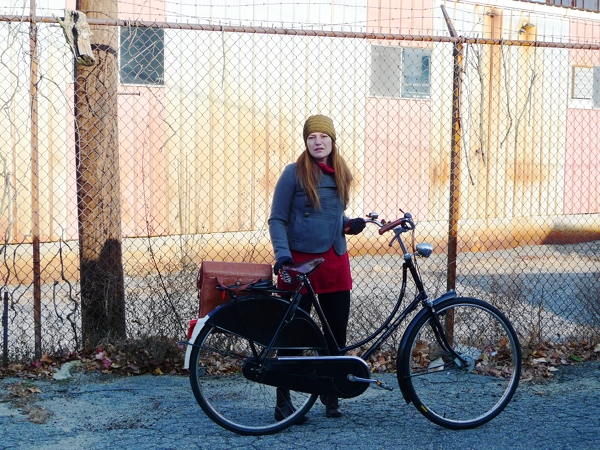
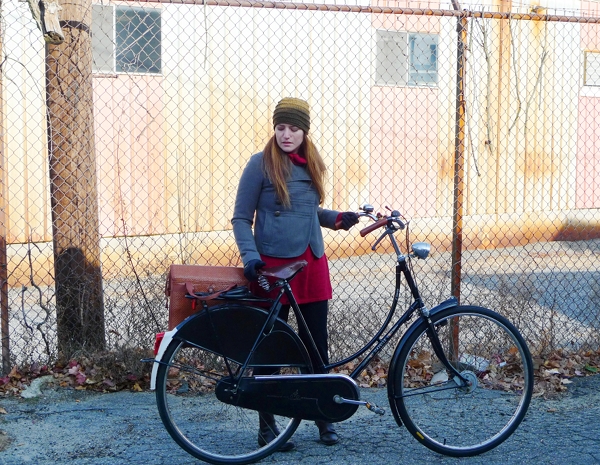
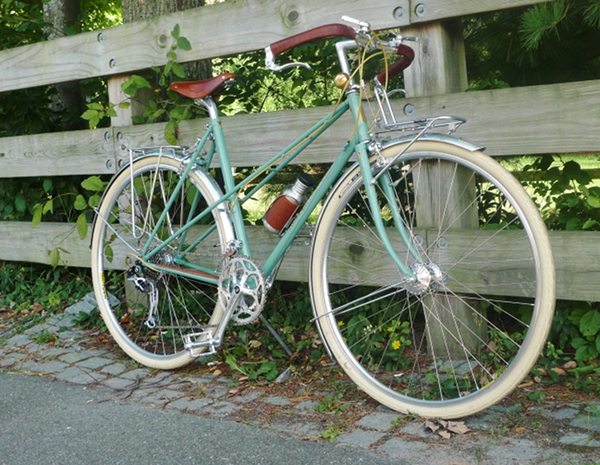
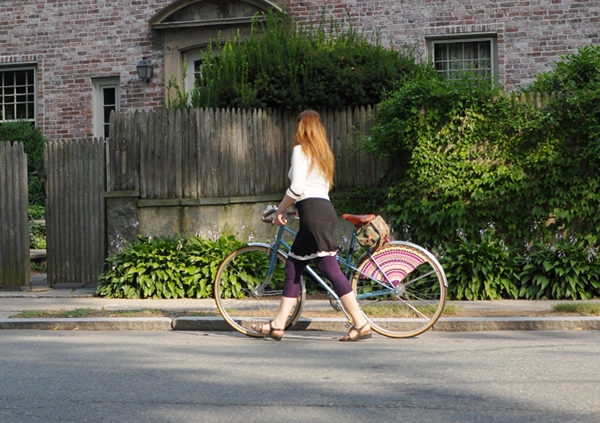
Some of my most interesting bicycle-related acquisitions have been through trades with others, and I find these barter exchanges to be great. Whether bicycle related or not, trades can work out nicely - with each party feeling as if they are getting something new and useful.

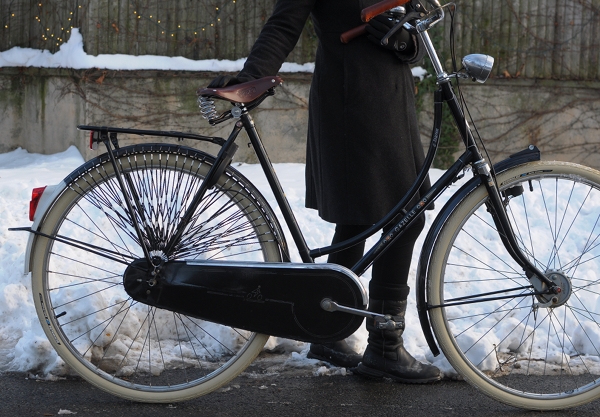
For instance, I received this vintage Ideale saddle in exchange for some vintage Brooks.

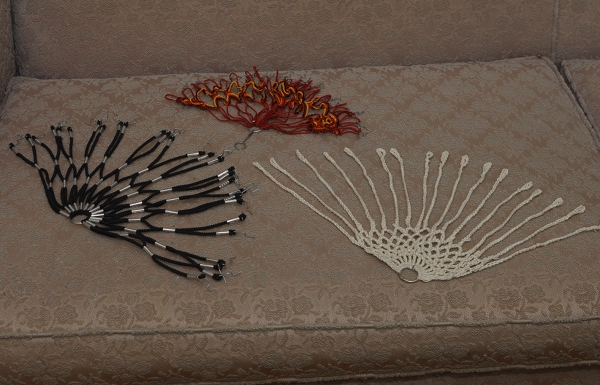
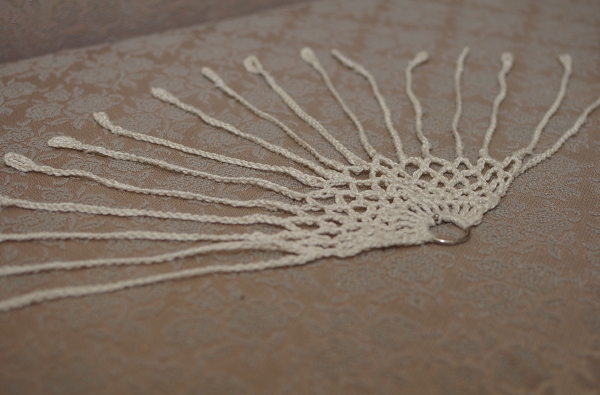
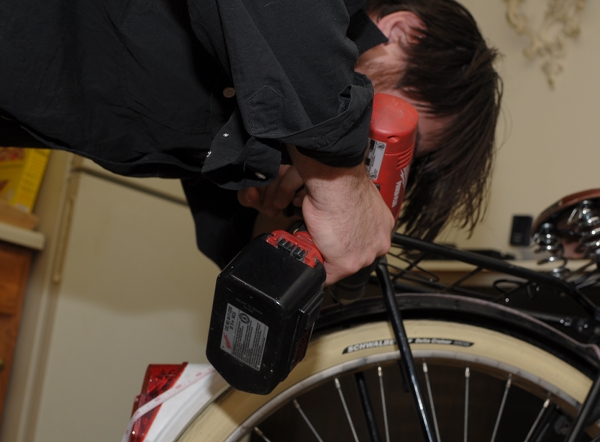
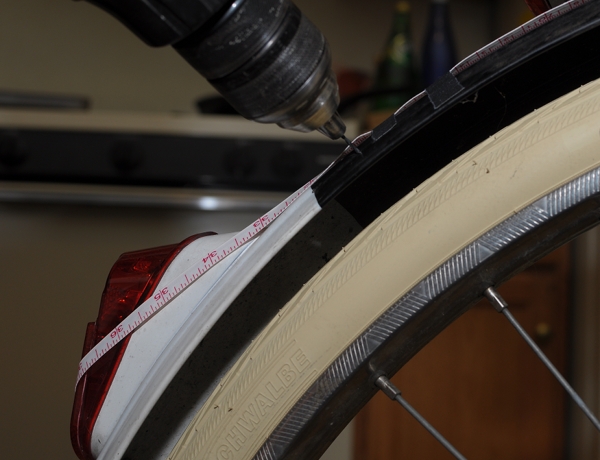
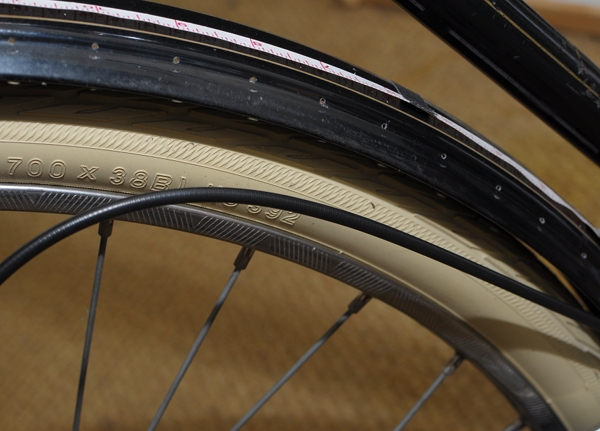
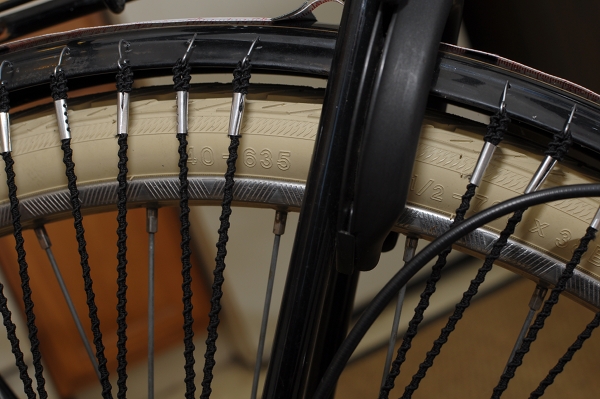
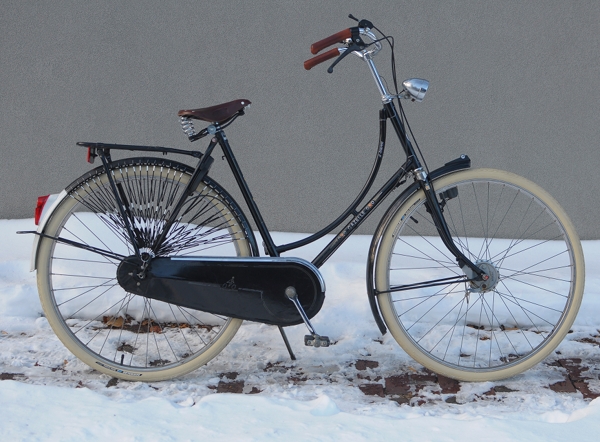
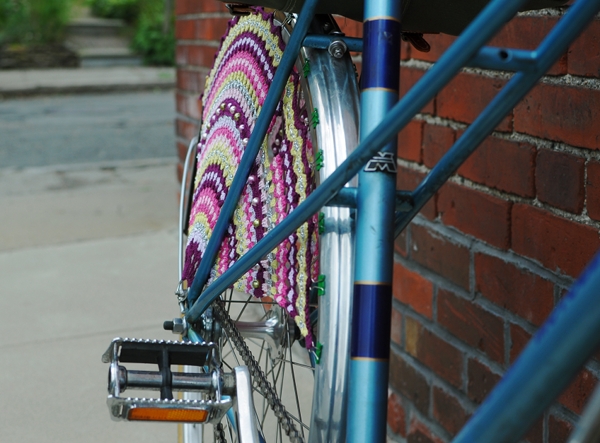
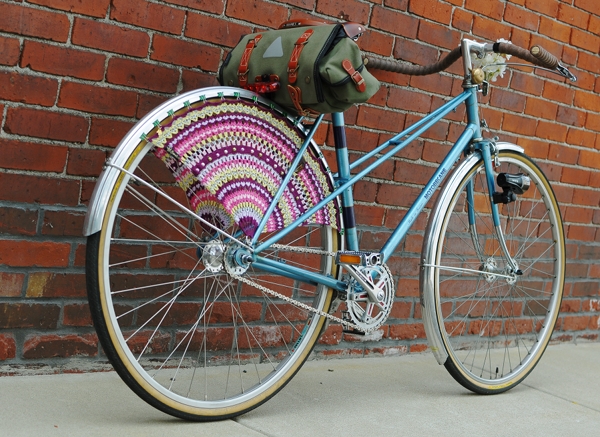
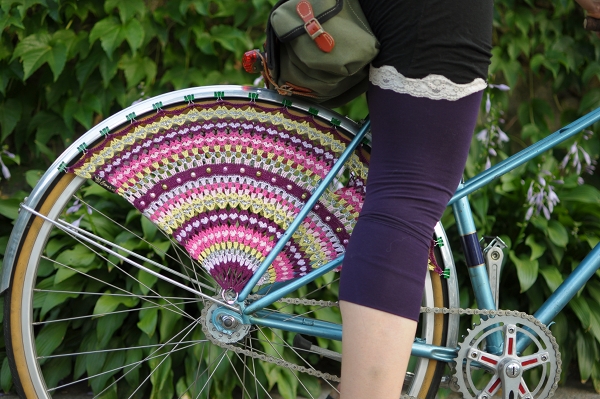
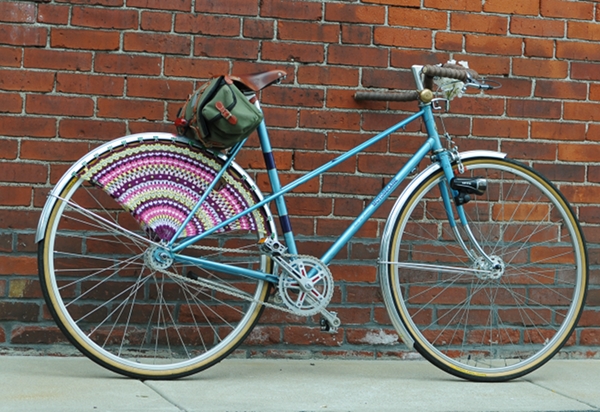
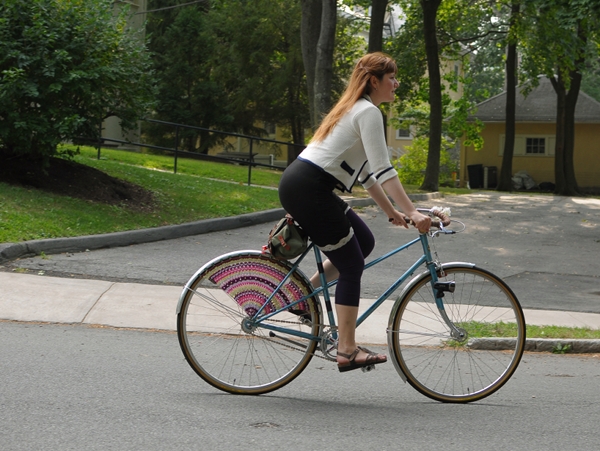
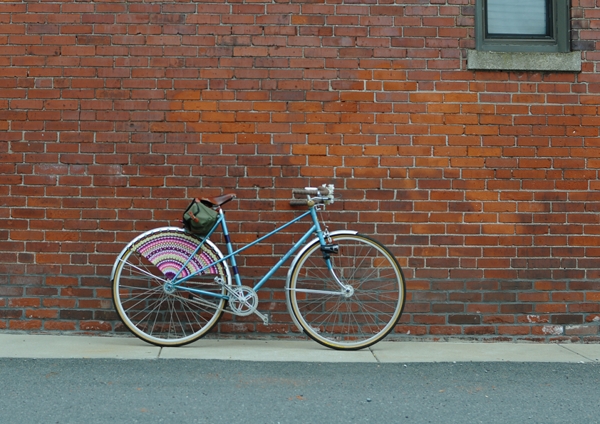
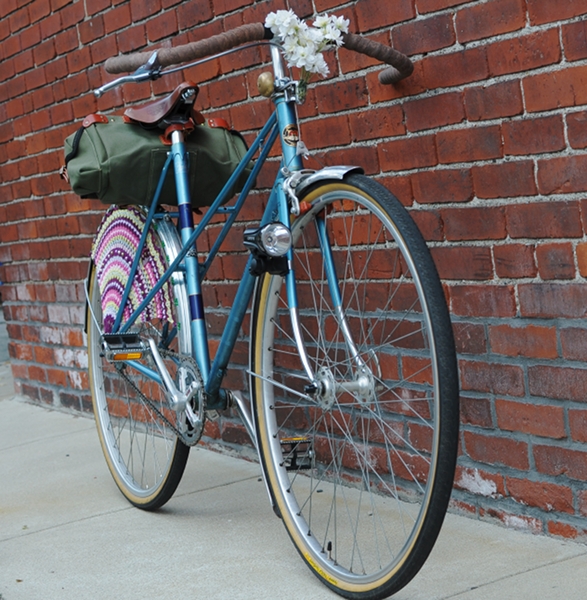
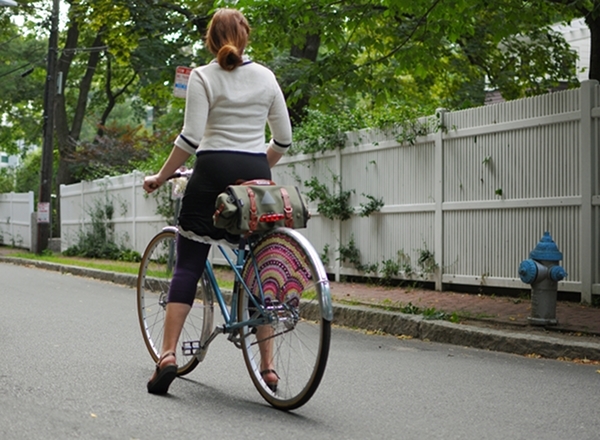
I received these beautiful dressguards in exchange for a spare saddlebag.

I even had some custom metalwork done in exchange for a basket. Other trades have included embroidery in exchange for a rear rack, collectible fountain pens in exchange for artwork, and products in exchange for photography.

A good place to start looking for bartering opportunities as far as bicycles go, is bikeforums. They've set up "For Trade" threads for different geographical regions, where you can list the items you have available and the items you are looking for. Here is the one for the Northeastern USA. I have been considering setting up something similar - but cannot think of a way to do it without it eating up too much of my time.

And while trades can be pre-determined and formal ("I'll give you my Item X in exchange for your Item Y"), they can also be a sort of reciprocal, whimsical gift-giving - like pen pals exchanging objects instead of letters: You send the person something you think they might like, and at some later point they do the same. There are no explicit arrangements or expectations, and that is the neat thing about it. I've had these types of exchanges with several bike people, and it's been really nice - my latest gift being the delightfully named "bike burrito."

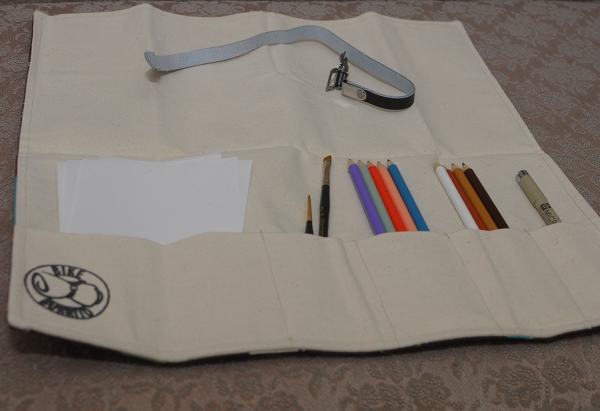
These things have fascinated me for some time, so I was pretty happy to get one. It's called a "bike burrito" because - well, it folds up like a burrito.

...And unfolds to reveal compartments for your tools. (We all have different concepts of "tools!")

The "burrito" is held together by a toe-clip strap, which can be easily threaded through the rails under your saddle. With the "epic" winter we are having, it's safe to say that I won't be using it any time soon - but it deserves to be seen!

Connecting with other bicycle-loving people from around the world can be fun, and can lead to all sorts of exchanges you would not otherwise have. What are your thoughts on developing a system to facilitate this? Would you find it helpful? What features would be useful? Would simply using the comments section of a post be enough, or do you think it won't work without a message board? Ideas welcome!

Monday, 3 January 2011

Woven Dress Guards for Drilled Fenders

I love the look and feel of woven dress guards. To me they seem more graceful than the solid vinyl type - allowing for the wheel's spokes to remain visible, while still protecting clothing from flying into them. They can also give a bicycle more "personality," as there are many patterns and different installation methods to choose from. A year ago, it was almost impossible to obtain dress guards like these without making them yourself. However, now there are several options available and I have done my best to get my hands on them.

Some of the most beautiful woven dress guards available today are these handmade ones by Bobbin & Sprocket. They can be crocheted in different patterns, according to your specifications (you can see them here on Bobbin & Sprocket's own bike and here on an ANT bike). I ordered a set for my mixte a couple of months ago, but have yet to attach them - because I've decided to do a drilled-fender installation, rather than use the clips provided. The clips don't attach securely enough for my fenders - and I am weary of having the guards fall off and get tangled in my wheel spokes. Earlier, I reviewed the Dutch Simeli dress guards, and clip and fender compatibility was also a problem (they only work on bikes where there is a lot of room between the fender and the tire).

For these reasons, I don't think clipping woven dress guards to fenders is the ideal solution, and suggest the traditional drilled-fender installation instead. I had this done to my vintage Raleigh DL-1 last year, using a simple set of dress guards that a reader had sent me from Portugal. The fancy ones in the picture above were a gift from a friend in Autsria, and are waiting for the right bicycle.

The ones I decided to install on my Gazelle were this set I bought from Mike Flanigan of ANT, who has recently begun to order them from Europe. They are simple, stretchy and durable, and I thought the colour scheme suited my Gazelle nicely.  Drilling fenders for dress guards may seem like a daunting task, but the actual act of installing them is not difficult, if you have a good drill. What's difficult is making the commitment: You can't "undo" the holes in your fender once they are there, and nearly every set of dress guards requires a different number of holes.

The first step is to consider what part of the wheel you want the dress guards to cover. There is no right or wrong in this regard: If you look at vintage dress guard installations, they are all over the place. Some prefer to cover 1/4 of the wheel, others prefer to cover the entire top half, and others still prefer something in between. Once you choose the coverage area, mark its beginning and end with masking tape. Then, evenly attach a tape measurer along this area. This will allow you to easily mark where the holes are supposed to be. The dress guards I used required 28 holes, which ended up being 1" apart.

Depending on what bike you have, you do not necessarily need to remove the rear wheel or even deflate the tire when drilling the holes. On Dutch bikes and English Roadsters, there tends to be so much room between the tire and fender, that if you insert the drill bit as far inside the drill as it will go, it will be too short to reach the tire after piercing the fender.

The hooks that come with dress guards are about as thick as medium-sized paperclips, so 1-1.5mm is a good size for the holes. We used a 1mm drill bit.

It is good to have a drill with a side handle attachment, as this allows you to keep your hands steady and to have more precise control over the drilling.

I would also suggest using a fresh drill bit and having a spare one before you start, in case it breaks. 

And here we go!

If you measured correctly, the holes should look fairly even - but if not, don't panic. These things are meant to have a hand-made look to them and are forgiving of small mistakes.

Inserting the hooks into the holes is fairly straightforward. One additional step to consider, is leaving room for the "cafe lock" if your bicycle has one. This should be done at the time you are measuring for holes in the first place.

At the drop-outs, the dress guards are typically attached to a bolt using a hook that is provided with the guards. (You will have to remove the nut, then insert the hook, then retighten the nut.) You may have to play around with how you angle that ring to which the cords are attached: The rack stays, the shifter cable and the hub indicator chain may interfere with it, and then you sort of have to angle the ring and insert it over/under, as applicable. Every bicycle is different in this regard, so it is impossible to give precise instructions here.

The important thing, is that in the end nothing sticks out in a way that can catch on your clothing. For example, we crimped the hook on which the ring rests, downward.

And that is pretty much it. Describing the process step by step in itself makes it seem complicated, but it only took us an hour - which I think is good, considering that it was our first time and we were afraid of messing up. You can see the finished installation in an outdoor setting in this post. Looking at the final result, one could say that these guards could look better if they were fanned out over a wider area - but I wanted the coverage to be denser. It's really a personal choice, and I am pretty happy with how mine have turned out. If you own a drill, this method of dress guard installation is worth considering.

Wednesday, 29 December 2010

Snow Queen!

My Gazelle "Linda" has now been updated for the winter, with new tires and woven dress guards. She is a beautiful sight to behold against the snowy landscape!

The tire replacement was something that had to be done anyhow, as the original ones were cracked and I did not want them to fail in the winter. And of course, I was only too happy to replace them with my favourite cream Schwalbe Delta Cruisers. As for the woven dress guards, there was no reason for them what so ever, other than aesthetic caprice. I thought that Linda looked somewhat generic with the solid black vinyl dress guards, and I wanted to personalise her. We purchased the woven dress guards from Mike Flanigan of ANT and installed them by drilling holes directly into the fenders. I have close-up pictures of the installation and will write a detailed tutorial in a separate post, for those interested.

Riding the Gazelle with the new tires, I immediately noticed that she became a bit faster and quicker to accelerate. This echoes my experience with Delta Cruisers on other bikes - which is one reason I love these tires so much. They are the best combination of city/ sporty/ cushy/ all-weather I have found so far. And okay, it does not hurt that they are available in cream!

It was interesting to cycle on the Gazelle after such a heavy snowfall, and to compare her handling to the Bella Ciao - which I rode immediately after the previous snowfall. Somewhat to my surprise, they handle similarly at slow speeds (under 10mph)- which is the speed I stick to under winter road conditions. The Bella Ciao's superior responsiveness and the Gazelle's superior cushiness are considerably less noticeable when cycling gingerly over slush and ice patches. Their common qualities, however, are all the more noticeable: Namely, how well-balanced and stable they both are. The Pashley I rode last year had these same qualities as well - so I think that all three are great winter bicycles.

The Gazelle does have a bit of an edge when cycling over large formations of hardened snow, due to its wider tires. On the other hand, the Bella Ciao has a considerable "winter cyclocross" advantage: It is easier to drag, lift and carry when road conditions necessitate getting off the bike and moving it over heaps of snow or patches of ice. Overall, I am honestly not sure which I prefer, and I see the two bikes as representing different ends of my winter comfort zone spectrum. The Gazelle has a rack and lights, so by default I ride it more. But once I install these on the Bella Ciao, that may change. For those who have tried different upright transportation bicycles in the winter (i.e., Pashley vs Workcycles vs Retrovelo vs Rivendell vs ANT vs Abici, etc.), I would love to know what you think of the handling.

After the first two snow storms of the season, I can already tell that I will have an easier time cycling this winter than I did last year. Nothing has really changed in a drastic way, but maybe my balancing skills have gradually improved and my lungs have grown accustomed to cycling in freezing temperatures. And as far as aesthetics go, I really do think that it helps to have a bicycle that you are excited about as a winter bike, rather than a "beater". This helped me last year and it's helping me now. The winter landscape is so beautiful, that cycling through it on a bicycle I love (and feel safe on) makes it all the more special.

Wednesday, 15 December 2010

User Friendly Interface

Now that it's winter, I find that strangers talk to me more than usual about cycling - typically when they see me locking up my bike. Over the past couple of weeks, several women have told me that they'd love to ride a bike, but find the logistics daunting: having to buy lights and figure out how to mount them; constantly getting flats (something they remember from previous cycling experiences); having to figure out how to carry their handbag, struggling to mount the bike in business attire, and other similar concerns. Their misgivings are fueled by the perception that cycling will complicate their lives - compared to walking, or taking public transportation, or driving.

What frustrates me about this, is that all of their concerns can be addressed with the right bike. As I explain about step-through frames, dynamo lighting, tires with puncture-protection, dress guards, chain cases, and panniers that attach to the bicycle's rack in seconds, I can see the ladies' faces light up as they eye these features hungrily.

One woman tried to step through my frame in her skirt-suit and squealed with delight when she was able to do it. She had never tried anything other than a mountainbike before. She said: "I knew you had a special type of bike! It's got this... user-friendly interface!" That phrase echoed in my mind for some time.

Even though I enjoy learning about bicycle design and own multiple bikes on which I constantly experiment, I am first and foremost a "transportation cyclist." My main priority is to have that one bike that is reliable, comfortable, and as low-maintenance as possible. The bicycle I use for transportation needs to make life easy for me. It needs to minimise the extent to which I think about it and tinker with it - so that I can focus on work and life itself, not on the bicycle.  Skirt suit? Heavy bag?  Dark outside? Raining like crazy? The "user friendly interface" on my machine accommodates all of these scenarios.

Many manufacturers are making what they are calling "transportation bicycles" nowadays, but not all of these bikes work for everyone. When a woman wearing a skirt suit walks into a bike store and says she would like to start cycling to work, my hope is that the salesperson will point to the section with the right kind of bicycle for her - rather than saying "Well, you won't be able to do it wearing that!" A user-friendly interface means that we should all be able to do it. Holiday wish: more elegant, practical, comfortable bicycle options for the women in skirt-suits who feel out of place in bike shops. It's getting better, but we aren't there yet.

Friday, 1 October 2010

Velophilia and Its Symptoms (and Announcing Dress Guards Recipient!)

Several days ago I offered to give away a set of dress guards, and the rule was for bicycles (not their owners) to post comments about why they would like them. I expected a dozen or so comments from bicycles, but received close to 40... which made me realise that I am by far not the only one to anthropomorphise my bicycles to a point that borders on delusion. And the good news, is that when 40 people share the same delusion, that's called sanity!

[image via Laura B.]

Without further ado, I now announce whom my bicycle Linda has chosen as the recipient of the dress guards: a 1950's step-through Dutch bike named Fanny (pictured above). Here is Fanny's comment:
I'm a Dutch lady, from the mysterious Fanal family, born in the 1950s. I have naked holes running along both sides of my back fender. After reading your post about dress guards, I realized how un-lady-like it has been to leave these dress guard anchors exposed. 
I have recently been working on my appearance--rust removal, new pedals, touch-up painting, pin-striping with a gold paint pen, re-shellacking my grips, etc. It would be so nice to show up at the farmer's market this weekend with a lovely dress guard. The lilac branches in my photo (link below) might have appreciated the guard, too.
Love,  
Fanny, the Fanal
A vintage Dutch bicycle who lives in exile in the US, loves lilacs and has gaping holes in her fender? Linda dabbed at her eyes with an embroidered hanky as she read Fanny's story, and would like her to have the dress guards. If Fanny's human companion Laura B. could please send me her mailing address, the dress guards shall be on their way to her shortly! And thank you everybody for all the bicycle comments on that post; they were hilarious and a lot of fun to read!

Speaking of acute symptoms of Velophilia, I knitted this skirt while convalescing from my hopefully-not-pneumonia. The design is bicycle friendly: It looks like a narrow pencil skirt from the front, but the pointed end in the back allows it to open up while pedaling. I think cycling exclusively on a road bike for the past several weeks has made me crazed with desire to ride an upright bicycle in a skirt again.

And once the skirt was completed, I also realised that my choice of yarn looked a little familiar...

Ah yes, my mixte! My Velophilia is at its most acute when something prevents me from cycling as much as I'd like. Everything I do ends up being about bicycles.  I look forward to returning to Boston later this weekend, hopefully entirely recovered. 

Tuesday, 28 September 2010

Lovely Dress Guards Give-Away

To brighten up your Fall, I am giving away these fantastic, colourful Dutch dress guards, which I reviewed here earlier.

To receive the dress guards, please ask your bicycle - yes, your bicycle - to post a comment here explaining why he or she would like them. A link to pictures of the bicycle is a plus (but please no nudity). My Dutch bike, Linda, will then decide which she likes best and will announce the recipient on Friday.

Comments by humans will be disregarded; bicycles only please. Multiple bicycles belonging to the same owner are eligible. Have fun, and thank you for reading Lovely Bicycle!

Monday, 16 August 2010

Handmade Dress Guards from Holland, by Simeli

My bicycles are not exactly run-of-the-mill, and they tend to get noticed when I am out and about. But nothing has compared to the effect of installing these dress guards on Marianne. Without exaggeration, the dress guards draw crowds of women, their eyes full of wonder at the sight of these unique creations. Subtle they are not. But they are sure to brighten up your day. I received these dress guards as part of an equal value exchange from Simeli (a sponsor July - August 2010), and here are my impressions:

First I must say that I've had the dress guards for some time now, but could not find a bike on which to install them. I was initially hoping to fit them on a loop frame bicycle, but all of mine already had dress guards and removing them would have been a pain. Finally I installed them on my mixte, and the combination is unexpectedly fabulous.

Here is a straight-up view. It is not as typical to install dress guards on a mixte as it is on step-through bicycles, but I really do not see why not. It was done in the past, and in Europe you will find many older mixte bicycles with holes drilled into the fender - evidence that at some point the dress guards were there. If you use your mixte for transportation and you wear fluttery skirts or coats, this is a useful accessory.

This angle gives you an idea of how the dress guards are attached: They connect to the bolts (or the fender stays) at the rear dropouts and to the fenders via clips. The clips are supplied by Simeli along with the dress guards, and are available in a variety of colours. If your fenders are deep enough to fit the clips without rubbing the wheel, you do not need to drill holes. However, please note that the attachment system was designed for the sort of wide, deep fenders that are found on Dutch bikes, English roadsters, and similar bicycles. If you have fenders like the ones pictured on my mixte, the clips will likely rub the tire. We have angled the clips on my bike as best as we could, and they still rub a bit. So if I keep this set-up in the long run, I will drill the fender and re-install the dress guards that way.

Simeli dress guards were designed to work with either 28" or 26" wheels, so anything in between is fine as well. This includes 650B, 27"and 700C wheels. The wheels on my bicycle here are 27" and the dress guards stretch tightly.

Another thing to note is that - like most dress guards - these have an opening to fit over either a "cafe lock" or a caliper brake on the rear wheel (click to enlarge the picture to see the opening). The opening is aligned with the  rear stays, so even if you have neither a lock nor a caliper brake on the rear wheel, it is unobtrusive.

As far as performance goes, these dress guards certainly do their job. They cover a large portion of the wheel and are densely knit. Any outfit you could wear is safe from the spokes with these installed. They do not shift or flutter or make any noise (other than the potential problem of the clips rubbing narrow fenders), and they hold up securely.

Of course the singlemost feature one is drawn to when discussing these, is the looks. There are several models offered by Simeli, and all of them feature crochet work in bright, cheerful colours. Mine are pink, lilac and light green, with silvery thread and a row of peralescent beads woven in between (the model is Linde).

Here is a close-up of the colours and the row of beads. If you've been reading this blog, you know that I do not tend to go for colourful designs like this, and instead gravitate towards neutral colour palettes. But it's nice to try new things once in a while, and hey - it's summer after all!

The shimmery aqua-blue of Marianne's frame is too much for me as it is, so I decided to go all out and make her my "technicolor dream coat" bicycle. And that she is!

But the crucial question: Would I buy these dress guards if they were not sent to me for review? I would if they were available in an off-white or natural-hemp sort of colour, or even something silvery or gold-ish. In fact, I am looking for something like that for the new custom mixte we are building up and would even gladly drill the fenders if they prove too tight for the clips. The bright and cheerful colours on the models currently available are not my style - but given the response they get out in the streets, I believe I am in the minority in that respect.

Final note: I've received emails from readers who are interested in the dress guards but cannot understand how to navigate the website (which is entirely in Dutch). If you'd like to order a set or have questions, please just contact Simone (the owner of Simeli) directly. She speaks English and can answer all your questions.

Friday, 6 August 2010

Dressguards and Chaincase: Do You Need Them?

Sometimes I get emails where ladies send me pictures of their bicycle and ask whether I think "it would look better" with dress guards and/or a chaincase.  Ladies... You do realise that these things are not there for the looks, right? Although a set of dress guards and a chaincase do lend a certain charm to a bicycle, aesthetics are not their primary purpose. So let me explain why I put them on my bikes, and then you can decide for yourself whether you need them or not.

The purpose of dress guards is to stop fluttery, loose clothing from flying into the spokes of your rear wheel and either getting ruined or causing an accident. The main determinant of whether you need dressguards is whether you wear the sort of clothing that requires their protection - for instance: flared skirts, dresses, long coats, or flowing tunics. Once you have had something get stuck in your rear spokes or have seen it happen to someone else, you know that the possibility is real and that it can even cause injury. Personally, I will not ride a bicycle without dress guards if an article of clothing I am wearing is long enough to reach the rear spokes. And since much of my everyday clothing is in that category, it is a good idea for me to install dress guards on any bike I plan to use for transportation.

I have also been asked what kind of dressguards are better: netted or solid.  There are probably differing opinions on this, but in my experience it does not matter. My vintage Raleigh (above) is fitted with very minimal dressguards that are basically just stretchy cords fanning out from the rear dropouts. For me, this has been sufficient; the cords - closely spaced - provide a perfectly functional barrier.  The obvious advantage to dress guards that are woven, is that they are lighter (and usually more attractive) than plastic ones. The disadvantage is that they can be more expensive and more difficult to clean.

Moving on to chaincases, their purpose is two-fold: (1) to prevent the bottoms of your trousers from being caught in the chain, and (2) to keep the chain clean from street grime, especially in bad weather. Since I seldom wear long trousers, the first function is not that important to me. So while I do appreciate that the chaincase keeps my chain nice and clean, this accessory is not as crucial for me as dress guards, because it is a maintenance feature rather than a safety feature. I can still ride a bike without a chaincase for transportation.

Furthermore, while I have found dress guards to be effective in preventing clothing from getting stuck in the spokes, I have not found chaincases to be entirely effective on those rare occasions when I do wear trousers. A couple of times, the bottoms of my trousers have actually gotten stuck on the chaincase itself, which has only increased my bias for skirts once I started cycling. Don't get me wrong, I still love a nice, elegant chaincase. But I admit that this feature does not hold as much functional purpose for me as do dress guards.

Dress guards and chaincases are not affectations, but necessary accessories for transportation in everyday clothing. As the popularity of "city bikes" rises, I hope that more American bicycle shops will realise this, and start carrying these useful items.

Ping Blog

Step 1
Blog URL:


Blog Title (optional):


Blog RSS Feed (optional):


I agree with terms of service.

Step 2
Copy the following code and put it on your blog/site to help our blog ping tool track your submission (Need help?):
;

 
Design by Free WordPress Themes | Bloggerized by Lasantha - Premium Blogger Themes | Best Buy Coupons