Showing posts with label grips. Show all posts

Sunday, 12 June 2011

Fizik Microtex Handlebar Tape

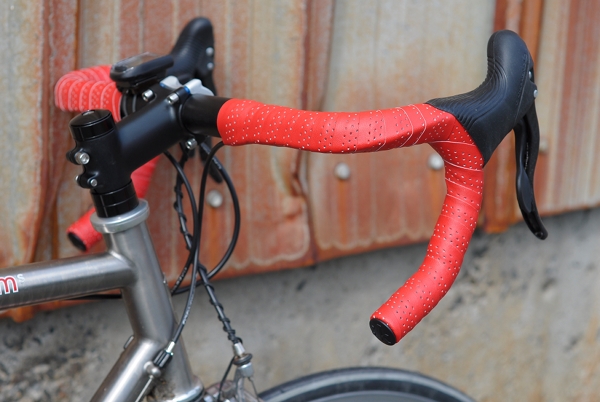
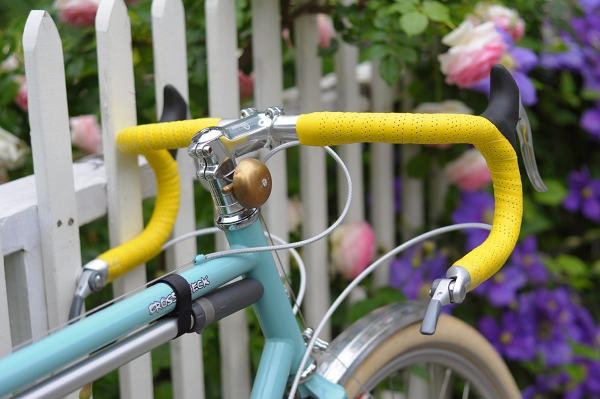
Last week we replaced the cloth tape on the Co-Habitant's Surly with Fizik Microtec tape. He wanted something that would not get dirty, did not require shellacking, and was not as heavily padded as cork tape. I've been using this tape in red for the past several weeks, so I suggested he try it. We both purchased it at Harris Cyclery, but it's available in many bike shops.

Fizik Microtec bar tape is a synthetic tape with about half the padding of typical cork tape. The perforated surface is smooth, but not slippery. It lies down flat, the edges resist fraying, and the surface stays clean. I know some complain that cloth and cork tape tend to get dirty and frayed, so if you want a bright handlebar tape that is durable and retains its colour, this could be it. Mine looks and feels the same after 300+ miles of sweaty gripping as it did when first installed. But more importantly, this tape could work for those who find cork tape too soft and cloth tape too hard - it is sort of the happy medium.

Although visually the perforations resemble leather tape, there are no tactile similarities. The Fizik tape is stiffer than leather, and it feels distinctly synthetic to the touch. While I would not describe the surface as slick, I can see how some might find it too smooth - especially if riding without gloves. My preferred handlebar wrap is cloth tape, but on some handlebars - particularly on modern ones that have channels for cables - I feel that I need more padding. The Fizik Microtex tape is durable, easy to wrap, provides just enough padding, and is available in a variety of colours.

Wednesday, 13 April 2011

Staining Your Grips to Match Your Saddle

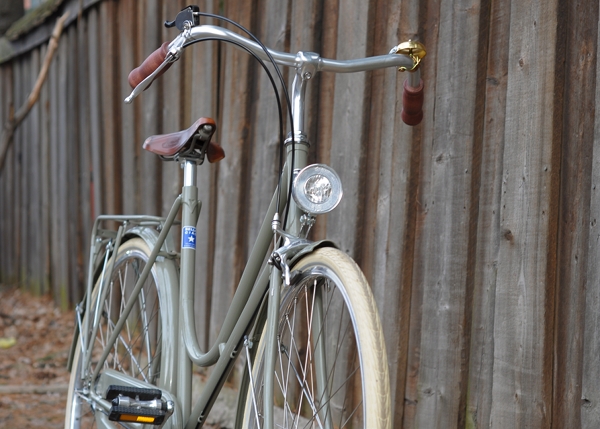
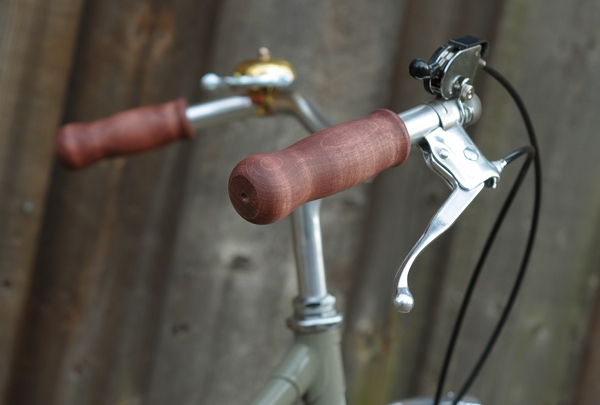
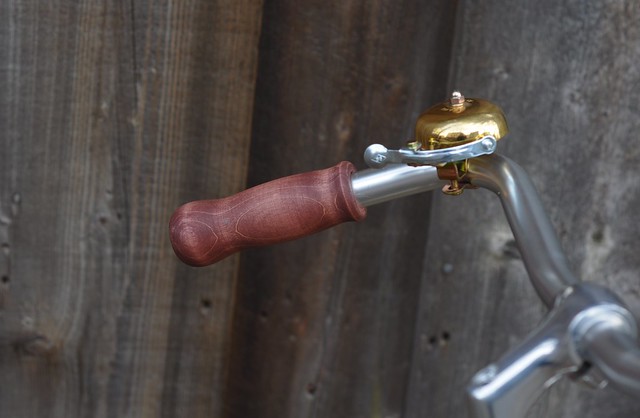
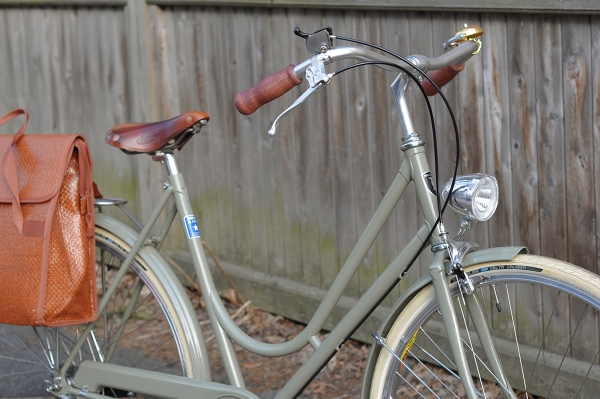
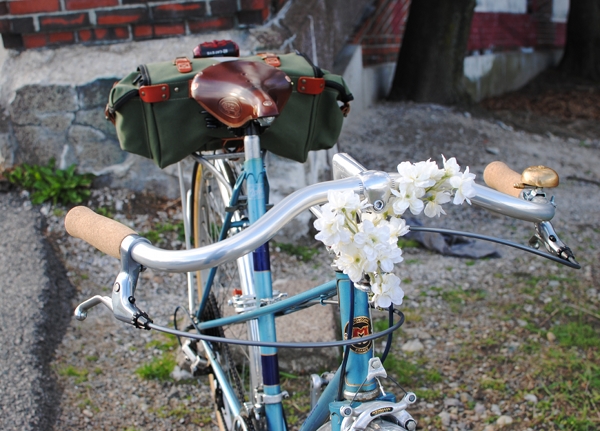
When I showed these pictures earlier, some of you noticed that the cork grips matched the bicycle's saddle and I explained that the grips were stained. Now I've done the same to my wooden grips, and will take this opportunity to describe the process for those interested.

What is staining?
Staining is inherently different from painting, in that the pigment gets absorbed into the surface, rather than sitting on top of it. This means that the natural texture of the material will remain prominent - the cork retaining its corkiness and the wood its woodiness. And unlike paint, stain won't crack.

Where to buy and what kind?
You can buy a small can of wood stain at any hardware store. There are many different kinds to choose from, all of which should work on both cork and wooden grips. I suggest choosing a stain that is oil-based, not water-based or synthetic. Oil-based stains permeate better, look more natural, and are more fade-resistant. 

Choosing a colour
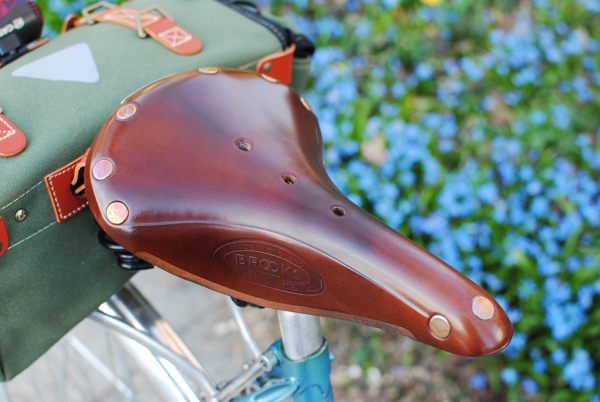
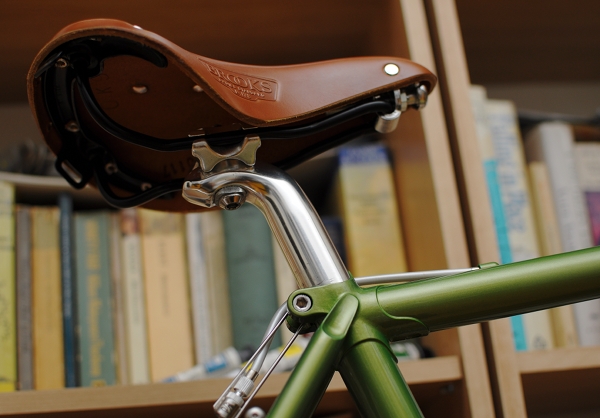
If you are looking for a natural colour that will match a brown leather saddle, the main thing is to determine whether your saddle has yellow, red, or ashen (neutral) undertones. For example, Brooks "brown" has a red undertone to it, whereas Brooks "honey" has a yellow undertone. Velo Orange brown leather saddles are more or less neutral. A wood stain that is described as either cherry, mahogany, or redwood, or contains anything "red" in the name will, as you might imagine, have red undertones. A stain that is described as pine, or oak, or contains anything "golden" in the name, will have yellow undertones. A stain described as walnut, driftwood or ash will have neutral undertones. If you are trying to match a black saddle, look for ebony. This basic range of stain colours should be available at most hardware stores.  

Applying wood stain
Oil-based stains require ventilation, so you will need to apply the stain in front of an open window or outdoors. Stir the stain inside the container very thoroughly, as the pigment tends to separate and settle on the bottom of the can. Then apply stain to the grips using an inexpensive paintbrush. Apply very thinly. The stain should not be leaking off of your grips and you should be able to see the texture of the wood or cork through it at all times - remember that it's more like a dye than a paint: slowly work it into the surface, rather than attempting to paint with it. Wipe the excess off with a napkin or rag and stand the grips to dry on a newspaper. Don't worry too much if your application doesn't look perfectly even; if anything, that complements the natural variations in the material. There is really not a whole lot you can do to mess this up. 

Allow at least 24 hours for the stain to dry, then decide whether you need another layer. For grips, one is usually sufficient. The more layers, the darker and more saturated the pigment will look. If desired, apply a layer of shellac after the stain is fully dry. The wooden grips pictured here are not shellacked, but the cork ones here are. 

And enjoy your beautifully matching saddle and grips. A pair of plain cork grips will set you back $10, and a small container of wood stain an additional $5. It's a fun and simple way to spruce up your handlebars. 

Thursday, 24 March 2011

(elk)Hide I Seek

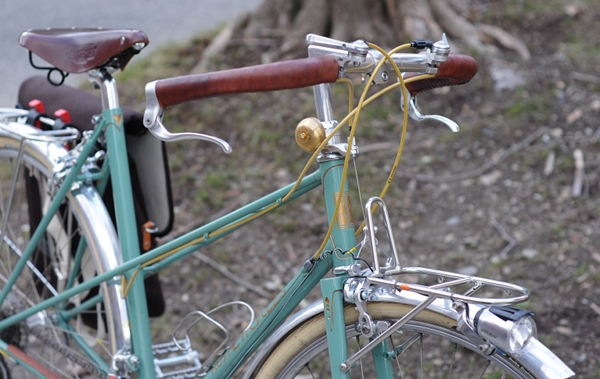
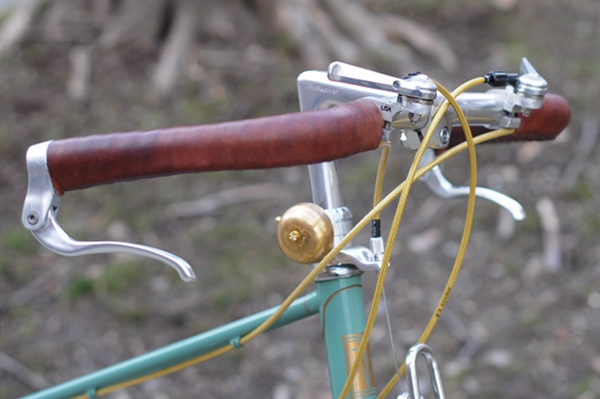
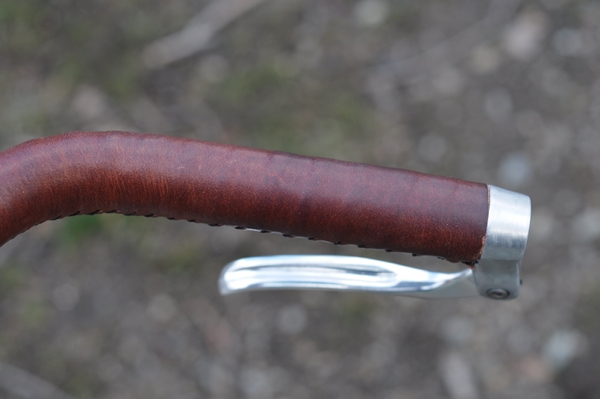
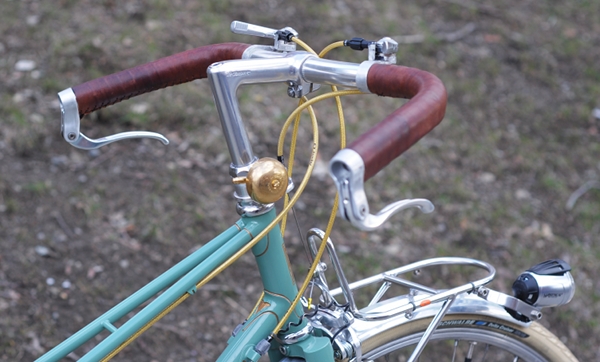
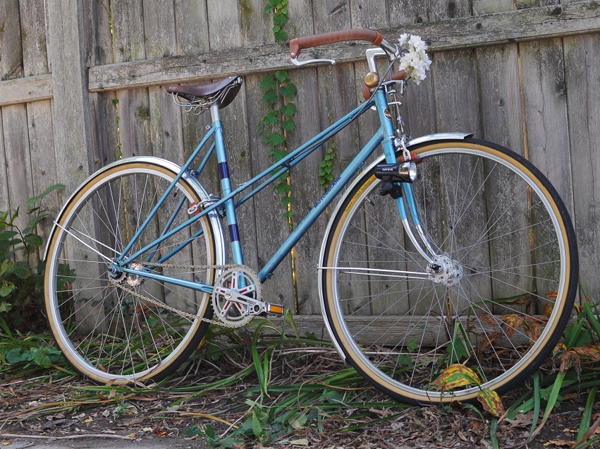
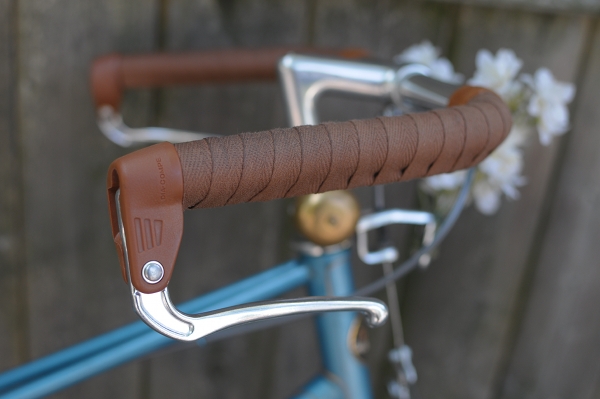
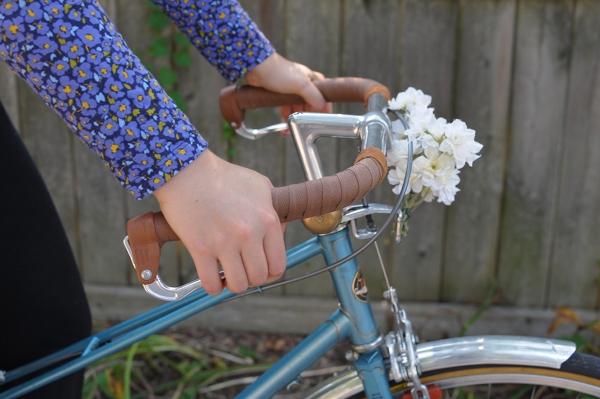
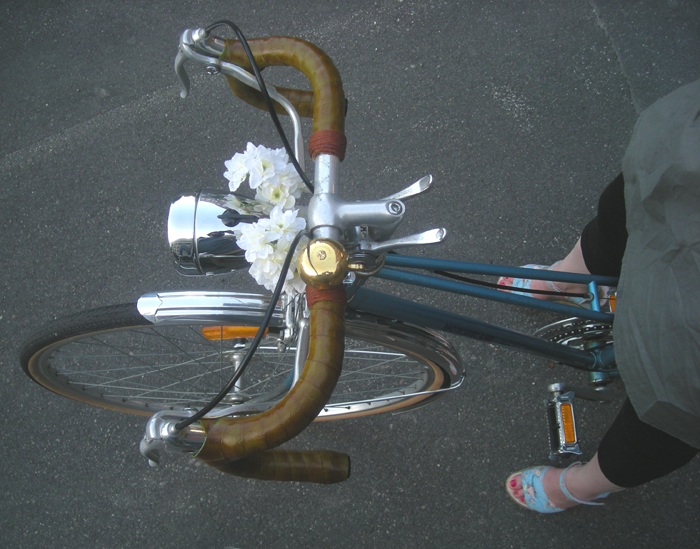
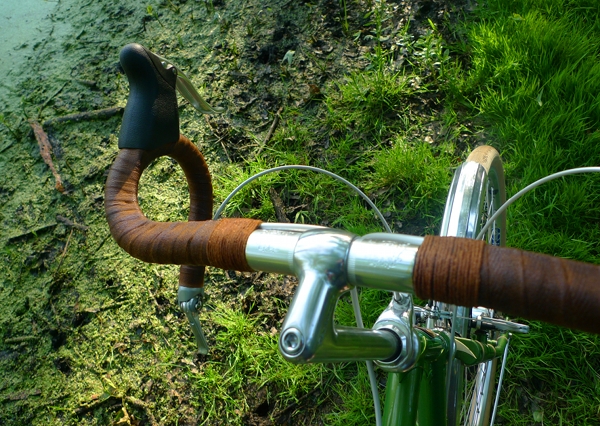
I get lots of questions about what handlebar tape I use on my mixte, so I've taken some close-ups. It's actually not tape at all, but elkhide sew-on city grips from Velo Orange. From a user's viewpoint, these are probably my favourite things to put on upright handlebars, because they feel the most comfortable to grip: not too hard and not to soft, just right. However, from an installer's viewpoint, they are kind of a pain to sew on and it takes forever. I've put them on two of my bicycles so far (the Royal H. and the Gazelle), each time thinking "never again!" while doing it. And yet, they are so comfortable, that I've just ordered another set.

The reason my elkhide grips look like bartape in pictures, is that I do have a layer of cloth tape installed underneath the leather. Doing this provides extra padding without making the gripping surface too soft. And the texture of the cloth tape printing through the leather feels ergonomic to my hands.

My grips are "espresso," to match my brown Brooks B72. When you first get these, they are kind of a dusty brick colour and don't match the Brooks brown at all - but they do once treated with Proofide (just install them first, then the Proofide).

As for the installation process... Let's just say lots of profanity was involved both times I sewed these on. VO recommends doing a 2-needle baseball cross-stitch, which is utterly foreign to me. After a half hour of unsuccessfully trying to figure out the instructions and undoing some very ugly sewing, I gave up and used my own stitch, which has held up pretty well since last September. Elkhide is a soft, almost buttery leather that weathers nicely and adapts to the shape of your grip - especially if you install it over a layer or cloth tape. Overall I find that it's worth it, despite the not-so-fun installation.

Sunday, 13 March 2011

Beautiful Stranger... Yet So Familiar

You know how it goes: Just when you thought you were over your Ex, she turns up wearing a sexy outfit. That's how I felt when I saw this creature in the neighbourhood! Though it wasn't my old bike, the beautiful stranger was not only of the same nationality, but had similar tastes in adornments.

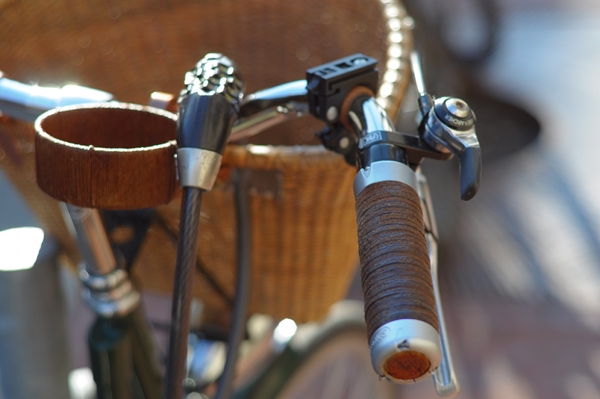
Leather washer grips and a twined coffee cup holder. Not sure what that additional black bracket is on the handlebar - maybe for an extra battery-powered headlight. The Co-Habitant and I were debating whether this is a newer Pashley or one from a few years ago. He thinks it's older, because the frame is muddy and the saddle is well broken in. I think it's newer, because of that Sturmey Archer shifter (didn't these just come out in 2010?). Also, the tires were not the usual Schwalbe Marathon Plus, but something by Continental.

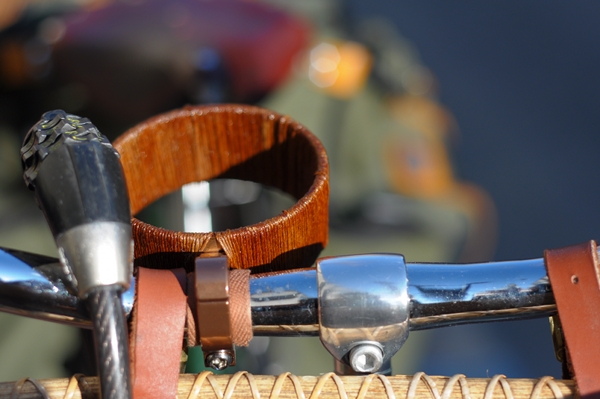
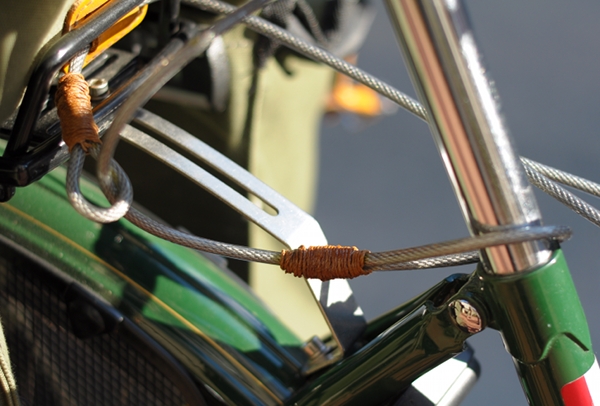
Close-up of the twined coffee cup holder. I've never seen one that integrates with the overall look of the bicycle more harmoniously! And I think the twine may also solve the loose fit/ rattling problem some of these cup holders are known to have.

Twined cable lock - just one of many locks that were keeping this Princess safe. I am ashamed to say that I never provided mine with this much security!

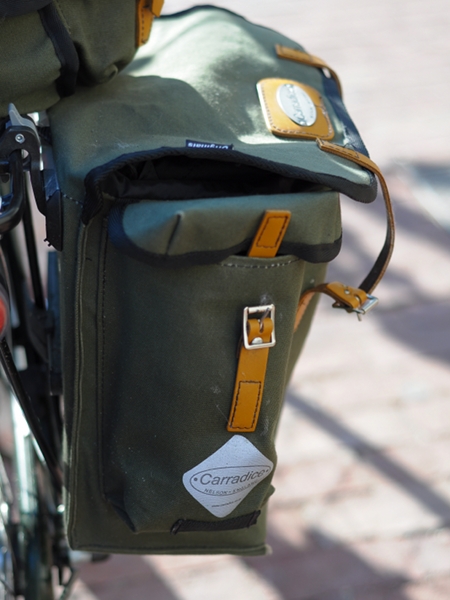
And the piece de resistance: a Carradician triumvirate, its olive magnificence catching the golden afternoon sunlight just so. The saddlebag is a Barley model, but I have never seen these Carradice panniers before.

The panniers are absolutely gorgeous and use what could be an Arkel mounting system. I wonder whether they are custom made (I know that Carradice will sometimes make bespoke items), or a new model I did not know about. Oh Beautiful Stranger, if only you could speak!

Thursday, 10 March 2011

Wood You?

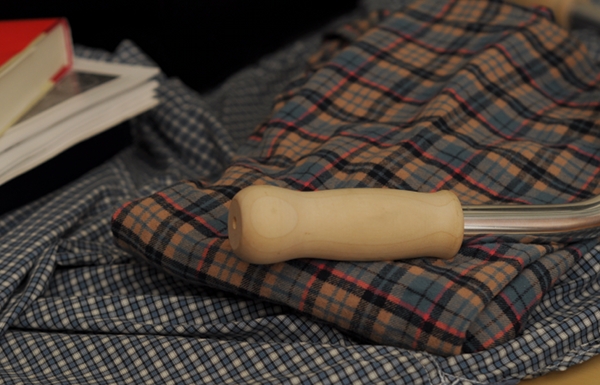
Anybody a fan of wooden handlebar grips? I've been attracted to them for some time and have seen a few on vintage and custom bikes, but have not tried riding with them. I requested these from Bella Ciao, and they sent me a set to try along with a bundle of other stuff for the Superba prototype. The grips are handmade in the EU and Bella Ciao carries them as a special order item. Not sure whether I will actually use these on the Superba, but I wanted to see - and more importantly feel - what they were like.

Here is what the grips look like on a set of handlebars. They are not fancy, but they are classic, nicely finished, and ergonomically shaped. I don't know about Italian city bikes, but I think they would be great on a path racer with upside down North Roads.

I don't know whether I will like these in practice, but in theory I think they could work nicely. While modern bikes tend to come with heavily padded grips, over time cyclists can discover that they prefer a harder gripping surface. That may sound counterintuitive, but padded grips can tense up the hands, whereas hard grips can allow hands to relax. Still, it's possible that the wood could be too hard. I am also curious how well wooden grips hold up in the rain and humidity: Do they swell, crack or distort? Some of the vintage ones I've seen have been quite worn, but did not show any signs of cracking or warping.

Aside from Bella Ciao, there are a few manufacturers who sell different versions of wooden grips, including Dia Compe and Cardiff. I remember Rivendell used to offer some last year as well, but I no longer see them on their website. There were also wooden grips shown at NAHBS a couple of weeks ago, according to this picture via BikeSnobNYC. If you have experience with any of these or others, I'd like to hear about it.  I will be installing mine over the weekend and will make it a point to test them on a long ride, leave them out in the rain, and otherwise abuse them to see how they behave in comparison to other types of grips.

Saturday, 13 November 2010

Pulling the Trigger vs Doing the Twist: Thoughts on 3-Speed Gear Shifters

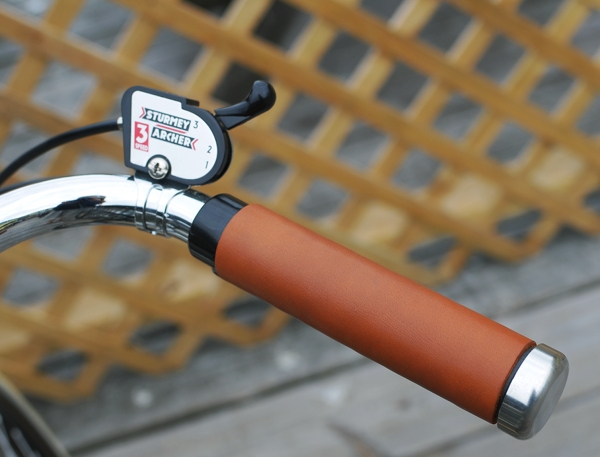
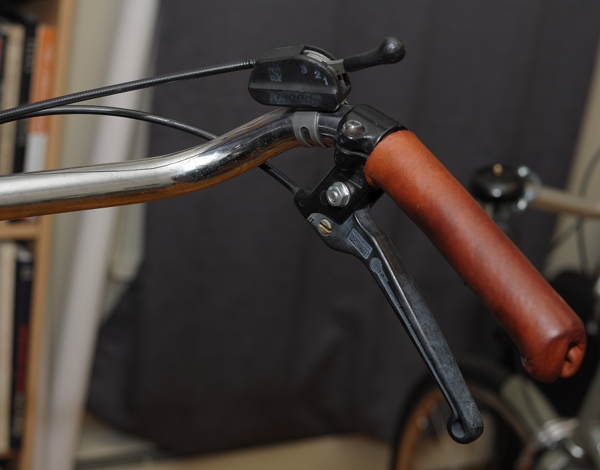
On bicycles with internally geared hubs, we typically see two types of gear shifters. The trigger shifter (pictured above) is a small gadget with a lever that is moved up and down. Today, this style of shifter usually accompanies Sturmey Archer hubs (though in Europe I have seen some lesser known models as well).

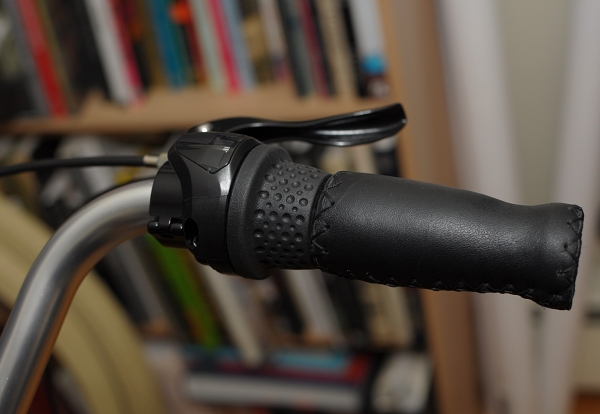
The twist shifter (pictured above) is a plastic and rubber enclosure that is built into the handlebar grip itself. To switch gears, you grab the rubber part and twist forward or backward. This style of shifter usually accompanies Shimano hubs.

After using both types of shifters on various bicycles I've owned to more or less the same extent, I have developed a strong preference for trigger shifters. When I tell people this, they tend to assume it has to do with "vintage aesthetics" - but actually, it has to do with comfort. A trigger shifter takes up very little space on the handlebars, as it is attached with a narrow bracket. This means that the shifter does not interfere with the gripping area, and allows me to install full-length grips on the handlebars.

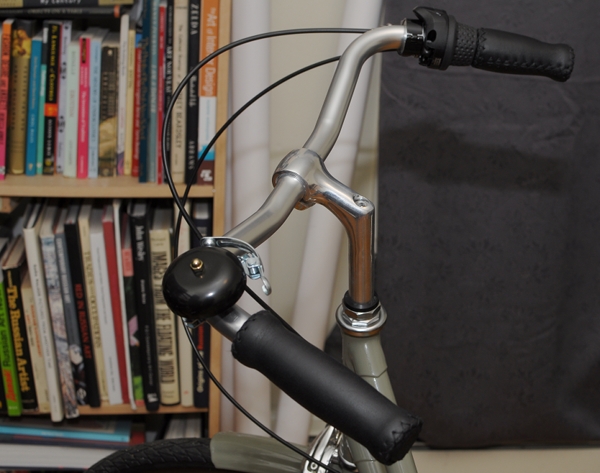
By contrast, having a twist shifter installed effectively cuts your gripping area in half. Notice that the right handlebar grip on the Bella Ciao above is shorter than the left grip - necessary in order to make room for the shifter. Granted, you can also keep your right hand on the rubber portion of the shifter itself - but it's not very comfortable, especially as there is a tactile break between where the real grip ends and the shifter begins.

But why is it important how long your grips are, as long as you are able to fit your hands on them? The reason, is that having room to move your hands around on the handlebars, even a little, can be essential for hand comfort - especially on long rides. If you ride your bicycle for just a couple of miles or so at a time, then you might not get the urge to move your hands around. But the longer your ride is, the more fatigued your hands will get if you keep them in the same position. Some people are more sensitive to this than others, and those who have nerve damage in their hands (like yours truly) are particularly prone to it. The feeling can range from numbness, to "pins and needles" to a more severe sensation of electric current running through the hand. It is not good to experience this problem, and having room on the handlebars to move your hands around allows you to avoid it. Long grips can also help you switch between a more relaxed and a more aggressive position on your bike (by holding the grips further forward or further backward) - giving you some added control over speed.

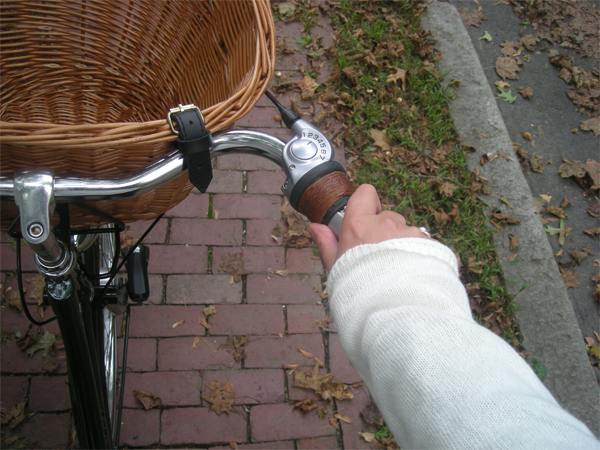
Getting back to shifter styles, here is my right hand on the shortened grip that is integrated with the twist shifter on my Bella Ciao. As you can see, my hand covers the entire grip, with no room to move around - unless I place it on the shifter itself, though even then it is limited. And I had the same problem with this shifter on my previously-owned Pashley, which came with the 7-speed Shimano hub I innocently selected.

On the other hand, here is my hand on the grip I installed on my Gazelle. As you can see, there is room for another handful - which is only possible because of the trigger shifter.

I will note that one benefit of the twist shifter, is that it is more integrated with your hand position - which can be a plus if you switch gears very frequently. But on bicycles with internally geared hubs - especially 3-speeds - I have found that I tend to stay in one "ideal" gear most of the time, switching to a lower gear only when going uphill, and switching to a higher gear only when cycling very fast or downhill. Having to reach with my finger to pull the trigger has not caused me any inconvenience in comparison to using the twist shifter. Your experience, of course, may differ.

While I am not suggesting that everybody ought to run out and demand trigger shifters with their 3-speed bicycles, I am hoping that this comparison will provide some food for thought to those who are getting a new bike, or deciding which hub to select with a new build. I would also like to ask whether anybody knows where I can find a trigger shifter that is compatible with a 3-speed Shimano Nexus hub? Even if it involves rigging something up with a "thumbie" derailleur-style shifter, I am up for it. Thanks in advance for any advice.

Thursday, 2 September 2010

French Experiments Continue: Belleville Handlebars and Inverse Brake Levers

Spare bicycle parts, a restless spirit, and a willing "guinea pig" can make for a dangerous combination. In her latest reincarnation, Marianne sports VO Belleville handlebars and Dia Compe inverse brake levers - a practice run to determine how a similar set-up would feel on the Royal H. mixte.

Here are the bars and levers in all of their French glory - on a Motobecane mixte with an Ideale saddle.

The Belleville handlebars are similar to the Porteur handlebars shown here. Both are a classic style of upright bars found on vintage French city bicycles. These bars are narrow, with long gripping areas that are nearly parallel to each other - placing the rider's hands in a position similar to holding a tray.  The Bellevilles are 5cm narrower than the Porteurs (43cm vs 48cm) and are completely straight across the front (whereas the Porteurs have a slight forward sweep).

It is typical to see handlebars like this fitted with inverse brake levers. My assumption is that this is done to maximise the gripping area of the bars. Because the levers are installed at the ends, there are no interruptions along the handlebar's surface and the cyclist is free to move their hands pretty much along the entire bar.

The inverse brake levers you will find today are most likely either Tektro or Dia Compe. Here I have installed the latter, and you can see that their brown rubbery tips go nicely with twined handlebars. It surprised me to learn that some dislike the Dia Compes because of the brown tips and prefer the Tektro levers instead - which are all-metal. To me, the rubbery surface felt nice, but I suppose it is a matter of personal preference. If you have used either of these levers, I'd like to hear your thoughts.

Braking with inverse levers.  I have found that I am able to get pretty good leverage almost no matter where I hold my hand along the bar, with the exception of the very front.

Can't brake from here, near the corners. But if I move my hands 1-2 inches back, it will work. This set-up is amazingly versatile in terms of the hand positions it allows.

The inverse levers are set back from the bars far enough so that they do not interfere with the grip. You can see in the pictures that they are nowhere near my knuckles. Truly a neat design.

If you are curious about this type of French set up, both the bars and the levers are surprisingly inexpensive. You will like them if you are a fan of narrow handlebars, and if you prefer to hold your hands to the sides rather than flared out or straight in front of you. I certainly fit that description, so both the Belleville and the Porteur handlebars feel as if they were made just for me. The super-wide Albatross bars were comfortable enough, but with the Bellevilles and the Porteurs I get that "spot on!" feeling. I also think that they are better match for French bicycles - especially for the Motobecane's aggressive handling.

I will pause and confess here, that this is the last change I will be making to Marianne... because she no longer belongs to me. Yes, I did sell her after all - to a lovely local woman whose acquaintance I had the pleasure of making this morning. Riding the Motobecane with the French handlebars and inverse levers yesterday, I finally felt that this bicycle was "perfect" and experienced a calm sense of satisfaction - not dissimilar to how I feel when a painting is finally "finished" or when a photograph looks just right. And after that, it finally felt appropriate to let her go. I hope the new owner enjoys her as much as I hope to enjoy my Royal H. mixte - which I will most definitely fit with a similar handlebar set-up.

Oh - and if anybody wants some Nitto Albatross bars (the alloy version) or VO Milan bars, drop me a line. Thankfully, I have no more "spare" bicycles to put them on.

Sunday, 13 June 2010

Knowing What You Like: Theory and Practice

If you are reading this, chances are you do a great deal of bicycle-related research - from reading blogs, product reviews, articles and DIY tips, to examining endless pictures of other people's bikes. In the absence of direct experience, this sort of research shapes our preferences and informs our decisions about what bicycles to get, as well as how to outfit them. Knowing a lot about something through research can sure make us feel as if we are "experts" at it. But the truth is, that until we try something ourselves, we have no idea what it's actually like. Theory is one thing; practice is another. I will confess some bicycle-related ideas that I loved after reading about them, but did not love so much after actually implementing them.

In theory, I love the look of shellacked cork grips and shellacked cork bartape. In practice, I found that the feel of shellacked cork is too glassy and slippery for my liking. The more layers of shellac, the nicer the cork looks... and the worse it feels to my hands. I really wanted to like it, but it just does not work for me. I prefer un-shellacked cork, shellacked cloth tape, leather grips, and even plastic grips.

Inexpensive cloth tape with just a couple of thin layers of shellac. Not as fancy and shiny, but my hands prefer it.

The "Special" version of Brooks saddles. I love the look of Brooks "Special" saddles with their pretty copper rivets - so much so, that last summer I paid a bit extra for a Flyer Special for my vintage Motobecane mixte, instead of getting the Standard. I have since learned that the Special versions of the saddles are apparently made of a thicker leather. In theory this is a good thing, as the saddles are more durable. In practice, it has proven impossible for me to break in my Flyer Special! A year later, and it still hurts.
The B17 Standard on my Hillborne has less of a "wow" factor, but I don't care: It took me a week to break in this saddle!

Last year, Honjo fluted fenders seemed like such a beautiful choice for Marianne. But while they truly are picture-perfect, they did not stay that way for long once I began riding my bike. The long smooth fluted surfaces of these fenders showcase every micro-scratch, and after a few months mine began to look pretty beat up. By contrast, the Co-Habitant's hammered Honjos disguise scratches and dents, as they are essentially "pre-dented". Though I prefer the look of the fluted model, I regret having bought such expensive fenders only to have them look battered. You live, you learn.
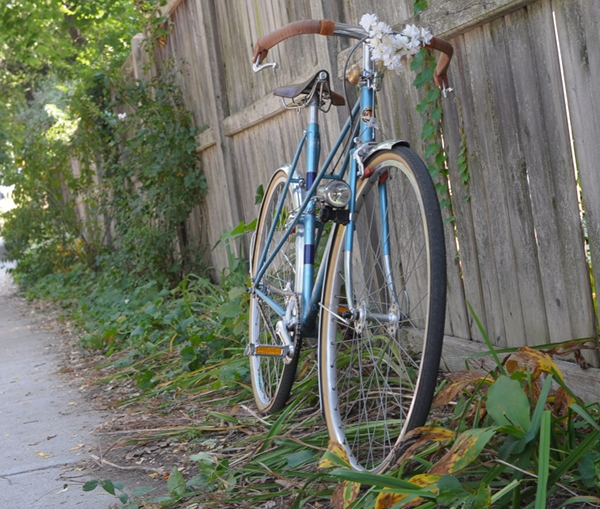
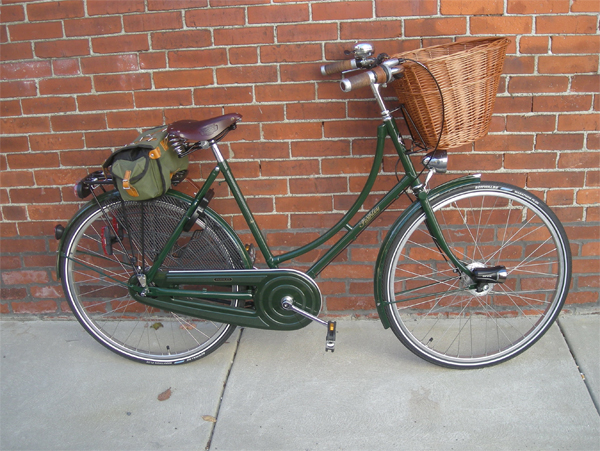
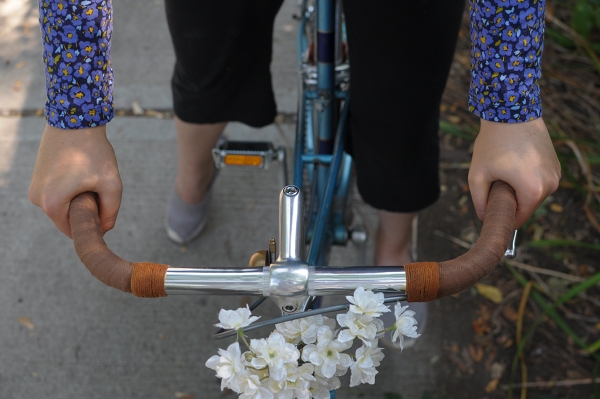
And then of course there is the lovely front wicker basket - that ultimate symbol of civilised, romantic cycling. Alas, it was not meant to be: experience has shown that I prefer the front of my bike to be free of large wicker objects, no matter how beautiful.
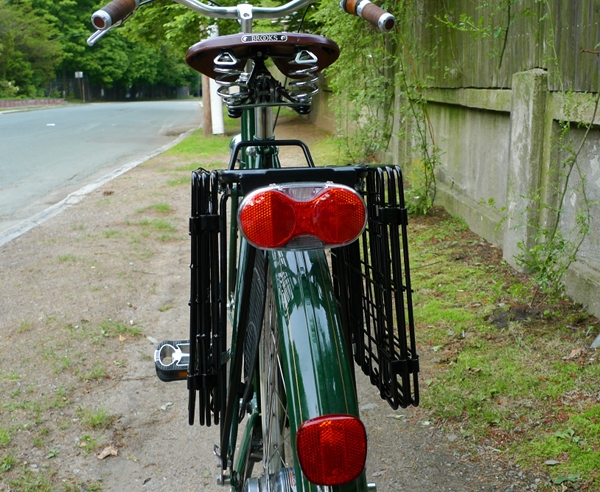
Instead, these rear folding baskets have proven to be just the thing for me. Not as cute as a wicker basket in the font, but they suit me better.
In describing my experiences, I by no means suggest that you should stay away from any of the products that did not work for me. My point is simply that you never know whether you will like something until you actually use it - regardless of how stunning it looks in pictures, or even of how obvious its benefits seem in product reviews. There is no way around personal experience, and bicycles are no exception.

Wednesday, 7 April 2010

Upside Down!

Fate has been kind to Marianne! Rather than being torn apart for donor components, she has been spared, and fitted with new handlebars.

What you see here are upside down Nitto Albatross Bars (Nitto's version of "North Roads").
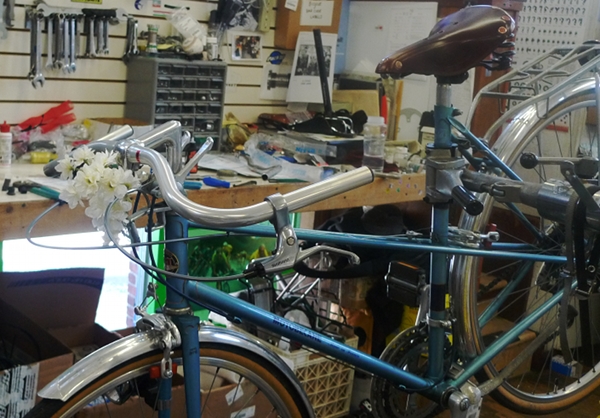
Ever since seeing pictures of vintage path-racers, it has been a fantasy of mine to have this handlebar set-up on one of my bikes. My concern was that it would be too aggressive for me to handle. But since Marianne's Milan bars were becoming increasingly uncomfortable on longer rides, I thought it might be time to revisit the possibility.

Harris Cyclery had some Albatross bars in stock, and the nice mechanic Jim Ammirato talked to me about installing them upside down. It is so difficult to tell what will feel "too aggressive" to one person versus "comfortable" to another. But luckily one of Jim's own bikes - a gorgeous bordeaux A.N.T. path-racer that deserves its own feature - had this exact set-up. I tried the handlebar position on the A.N.T., and to my amazement it felt wonderful. And so the installation proceeded!
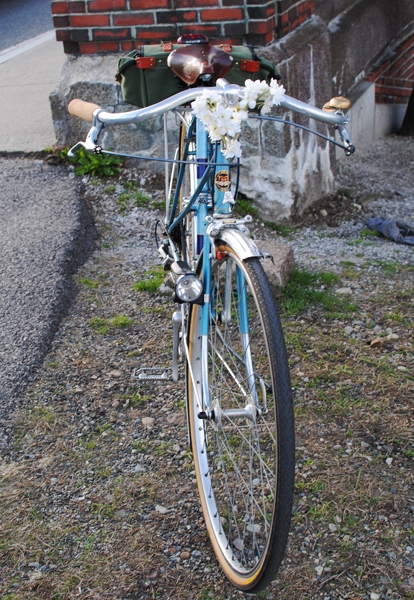
As you can see in the pictures here, installing North Road style handlebars upside down places the hand gripping areas considerably below the level of the stem, while at the same time bringing them closer towards the rider than drop bars. You can control just how far down the gripping areas are by tilting the bar. We made mine on the tamer side to start with, but when I feel ready for a more aggressive posture I will tilt them down further.
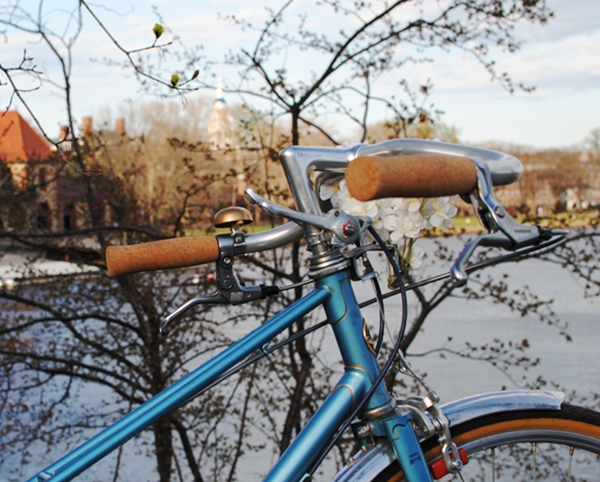
North Roads are famously comfortable, because their gripping areas place the rider's hands in a naturally-occurring position: parallel to the body with an ever so slight outward flare. This is in direct contrast to flat handlebar styles (which includes the flat upper part of the drop bars, where most cyclists really spend most of their time). They position they offer is not a naturally occurring and places stress on the wrists if maintained for long intervals.
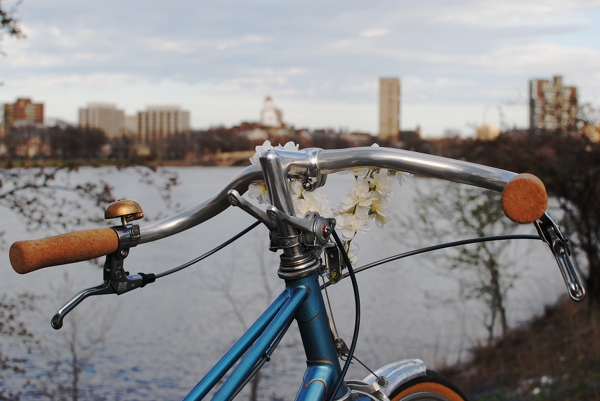
So the cool thing about upside-down North Roads, is that the aggressiveness of the posture is dampened by the comfort of the hand position. If you own an English Roadster or a Dutch bicycle, imagine holding your hands just as you currently hold them, only lower. Not so scary at all.

Perhaps this explains how it is that with the upside-down Albatross bars I am both more leaned over and more comfortable than with my previous Milan bars. I have ridden 13 miles with the new set-up so far, and it's been exhilarating. Of course a longer trip will allow me to give the final verdict.
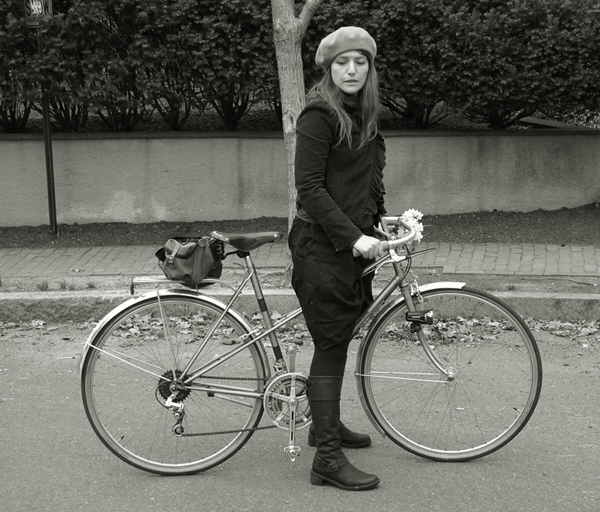
Since these pictures were taken, I have treated the cork grips with wood stain in an attempt to darken them without the slippery finish of shellac. I am still waiting for them to dry and will let you know how this project works out.

Ping Blog

Step 1
Blog URL:


Blog Title (optional):


Blog RSS Feed (optional):


I agree with terms of service.

Step 2
Copy the following code and put it on your blog/site to help our blog ping tool track your submission (Need help?):
;

 
Design by Free WordPress Themes | Bloggerized by Lasantha - Premium Blogger Themes | Best Buy Coupons