Showing posts with label handlebars. Show all posts

Thursday, 21 July 2011

Junk Miles: Not an Insult

Tired Computer
Since having gotten into roadcycling, I find myself in the hilarious position where both "roadies" and "non-roadies" will ask me questions about the imagined other, as if I can provide inside information. Of course the dichotomy is mostly a false one, but that hardly matters. I get questions such as "So why do roadies ___ when they ___?" or "So when people ride bikes to work, how in the world do they ____?" Half the time I don't even know what the person means, but it's always entertaining. It also shows our readiness to think in terms of ingroup/outgroup - attributing exotic, irrational tendencies to the outgroup while perceiving the ingroup as entirely normal. 

Anyhow, the latest conversation I had in this context was about "junk miles." Before I even knew what that term meant, I'd noticed that transportation cyclists find it offensive - perceiving it as a derogatory expression used by roadcyclists to be dismissive of any other type of riding. In keeping with this, last week someone asked me: "So when you go to the grocery store, do you now think of it as junk miles?" - the idea being that the person assumed roadies do not consider that sort of thing to be "real" cycling, hence junk miles or wasted time on a bike. 

All right. So allow me to attempt to explain "junk miles" as I now understand it from a roadcycling perspective, because the term appears to be widely misunderstood. Transportation cycling is not junk miles. A fun ride with friends at a leisurely pace is not junk miles. Relaxed touring is not junk miles. Nothing you do outside the realm of cycling as a sport is junk miles, because the term simply does not apply to you.

But let's say you are a roadcyclist who is training for a race. This means that you want to improve your performance, to become faster. In order to train effectively for this purpose, it is generally suggested that you alternate training rides that are super-difficult with rides that are easy. The super-difficult rides will push you beyond your current abilities and the easy rides will allow you to recover. What you don't want to do too much of are rides that are in between. Those types of rides are called "junk miles," because they don't help you get faster, but they don't allow you to recover either. That's it; that is what the term means. It is used exclusively within the context of roadcycling, and with the assumption that the person is an athlete, intentionally engaging in goal-oriented training. The term does not refer to other forms of cycling. 

I am not sure how the misunderstanding originated that "junk miles" is an insult to transportation or leisurely cyclists, but it is exactly that: a misunderstanding. 

Wednesday, 13 July 2011

Shifter Placement on a Mixte: an Aesthetic and Functional Challenge

Porteur Bars, Elkhide Grips, Inverse Levers, Silver Shifters
I've been asked to describe how the shifters are set up on my mixte, but I hesitate to write about it, because I don't necessarily recommend this method. My handlebar setup consists of inverse brake levers, elk hide grips covering the entire handlebar, and bar-end friction shifters mounted upon "thumbies" up toward the front. The rationale here was to leave as much of the handlebar area uninterrupted as possible, allowing for a variety of hand positions. It works nicely in that context, but it is not for everyone - which brings me to the issue so many have written to me about: There seem to be few options for mounting gear shifters on a mixte with upright handlebars that are both elegant and convenient. Personally, I find my own setup not entirely elegant: Too many cables up front. And it's not entirely convenient either: The levers can only be reached when the hands are in the aggressive forward position on the bars. But what other possibilities are there?

Shimano Shifters and Paul Thumbies on Betty Foy
One alternative is to move the shifters closer to the edges of the handlebars, so that they are near the brake levers. This placement is more convenient if that is the position where you tend to hold your hands the most, and since I've been using my own mixte more and more as a city bike I am considering switching to something like this. The problem, however, is that placing the shifters here interrupts the handlebars and limits potential hand positions: It will not be possible to slide my hands back and forth along the bars the way it's possible on my current mixte set-up. Also, it's essential to get the angle of the shifters just right, and doing so does not always result in attractive placement. Finally, both with my current set-up and with the set-up pictured above, there is something messy-looking to my eye in having so many cables sprouting from the handlebars. I have not been able to find a way to make handlebar-mounted shifters look attractive.

Royal H Handlebars, Take 1: Porteur, Guidonnet, Bar-Ends
A potential way to clean up the handlebar setup from the "messy cables" look while keeping the shifters within reach is to opt for bar-ends. I tried this prior to my current setup, but quickly discovered that this works well only with the wide Nitto Albatross bars used by Rivendell, and ideally on a bike with a long virtual top tube and/or with the handlebars raised high. Otherwise, you may discover that the bar-end shifters will poke you in the knees to the point where it could interfere with pedaling on turns. That is exactly what happened when I tried them on my small sized mixte with narrow Porteur bars.

Mercier Updates
If none of these methods appeal to you, you can go the vintage route - one possibility being to mount the shifters on the stem. However, generally this is not recommended for a number of reasons. Some claim that mounting the shifters in this spot is dangerous, because they could potentially "impale" you if you fall forward on your bike. To me this seems rather far-fetched: After all, it's common to have bruises on your thighs from bumping into bar-end shifters, yet no one claims they are dangerous. I think the real reason stem shifters are disliked is that they are considered to be a symbol of lower-end bikes: In the '70s, stem shifters meant that a bike was marketed for amateurs who held their hands mostly on top of the handlebars and were unable to reach downtube shifters.

Mercier Mixte: Headtube Lugs, Downtube Shifters
But while downtube shifters offer elegance and simplicity, removing the second set of cables from the handlebars entirely, most cyclists who are looking for an upright mixte find them difficult to use. In order to shift gears, you have to remove you hand from the handlebars are reach quite a ways down. Particularly if you are sitting upright, this is inconvenient - not to mention beyond the skill level of some cyclists.

Belleville Handlebars, Dia Compe Levers
As far as aesthetics go, a mixte frame is a challenge to set up, because the twin lateral stays already add a degree of visual complexity to the looks. If you add a cluttered handlebar set-up to that, it can get pretty messy. In vintage photos and in handmade bicycle shows, the cleanest looking mixtes tend to be set up either as single speeds, with hub gearing, or with single chinrings - ensuring that there is, at most, only one shifter to deal with. But in practice, most mixtes today are set up with derailleur gearing and either double or triple chainrings - presenting an aesthetic and functional challenge. 

While I cannot offer a solution that would suit everyone's tastes, I wanted to share the methods I know of and the pros and cons of each, as I see them. How have you set up the shifters on your mixte, and are you happy with them in terms of user-friendliness and looks?

Friday, 8 July 2011

Adjustable Stem!

Randonneur, Adjustable Stem
When I wrote about wanting a longer stem on one of my bikes, several people suggested I get ahold of a vintage adjustable stem. I did not know that such a thing existed, but clearly there is much I don't know.

Long story short, I am now in the temporary possession of a 3ttt Record Regolabile adjustable stem, on loan courtesy of Jan Heine of the Bicycle Quarterly. I decided to use it not on my own bike, but on the Royal H. randonneur collaboration - it just looked so appropriate.

Produced in the 1970s by Tecno Tubo Torino of Italy, this elegant stem adjusts from (I think) 6 cm to 12 cm. Here is more information about it and some close-up pictures. The beauty of this system is that it combines the vertical adjustability of the quill stem with the horizontal adjustability of the threadless stem (with the latter you can swap out stems without redoing your handlebar set-up). Why are things like this not being made anymore? Those of us who constantly change our minds about handlebar positions would find it extremely useful. Right now I have it adjusted for 8 cm, but who knows what the future holds - I am looking forward to playing around with this! 

Sunday, 12 June 2011

Fizik Microtex Handlebar Tape

Last week we replaced the cloth tape on the Co-Habitant's Surly with Fizik Microtec tape. He wanted something that would not get dirty, did not require shellacking, and was not as heavily padded as cork tape. I've been using this tape in red for the past several weeks, so I suggested he try it. We both purchased it at Harris Cyclery, but it's available in many bike shops.

Fizik Microtec bar tape is a synthetic tape with about half the padding of typical cork tape. The perforated surface is smooth, but not slippery. It lies down flat, the edges resist fraying, and the surface stays clean. I know some complain that cloth and cork tape tend to get dirty and frayed, so if you want a bright handlebar tape that is durable and retains its colour, this could be it. Mine looks and feels the same after 300+ miles of sweaty gripping as it did when first installed. But more importantly, this tape could work for those who find cork tape too soft and cloth tape too hard - it is sort of the happy medium.

Although visually the perforations resemble leather tape, there are no tactile similarities. The Fizik tape is stiffer than leather, and it feels distinctly synthetic to the touch. While I would not describe the surface as slick, I can see how some might find it too smooth - especially if riding without gloves. My preferred handlebar wrap is cloth tape, but on some handlebars - particularly on modern ones that have channels for cables - I feel that I need more padding. The Fizik Microtex tape is durable, easy to wrap, provides just enough padding, and is available in a variety of colours.

Wednesday, 20 April 2011

Threadless Stems: the Good, the Bad and the Ugly

With the Urbana bike temporarily in my possession and the Surly bikes we rode last week-end, I have suddenly undergone a crash course in threadless stems. Though of course I have seen them on bikes before, now I got to actually play around with one and understand it firsthand.

In the world of classic and vintage bicycles, you will find a strong preference for threaded (quill) stems, and for good reason: Threadless stems are a fairly recent invention and their thick, boxy shape tends to clash with the more elegant lines of a lugged steel frame. In other words, they are considered "ugly." But I do not necessarily share this sentiment. While it is true that many - probably most - of the threadless stems we see on production bikes are clunky and offensive-looking, it does not have to be that way: Ugliness is not an inherent property of a threadless stem, but a byproduct of modern manufacturers generally catering to an "athletic gear" aesthetic. Elegant, polished alloy threadless stems do exist - made by the likes of Nitto and Velo Orange. Here is a nice fillet-brazed threadless stem and even a lugged one. Threadless stems can also be painted to match the frame of the bicycle, which to my eye actually works better than when the same is attempted with a quill stem. Even the simple, utilitarian stem on the Urbana bike doesn't look at all bad: I think it suits this bicycle's chunky tubing and contemporary style.

Of course the other major criticism of threadless stems is a practical one, and it is one with which I do agree: While quill stems can easily be raised and lowered to adjust handlebar height, threadless stems cannot. When buying a new frame meant for a threadless stem, there is a process (which I only half-understand), whereby you decide on the handlebar height you want, and they cut the steerer tube accordingly, then attach the threadless headset, spacers, and stem. After that, the handlebar height you chose is fixed, and it is not entirely clear to me what the options are, should you change your mind down the road and want the handlebars raised or lowered.

With a pre-assembled bike there is even less choice, because the threadless stem is already installed and the handlebar height is predetermined without your involvement. For me, this system would pose a major problem - especially on a roadbike - as it usually takes me a while to fine tune my preferred handlebar height on any given bike, and even after that I just occasionally feel like a change. With a threadless stem, I would be out of luck. If you are a novice road cyclist, this also makes it impossible to get yourself gradually accustomed to drop bars via the "lowering the stem" method I described earlier.

But while the lack of height adjustability is a drawback, I also discovered an unexpected benefit to the threadless stem: It is easier for me to work on. As mentioned before, I have problems with my hands that, frustratingly, make it mostly impossible for me to work on bikes. I know how to do most of the stuff and can give clear instructions to someone else, but typically lack the hand strength necessary to perform the operations myself. Not so with the Urbana bike. I first noticed that I was able to work on this bicycle, when we were putting it together and I tightened a bolt that I normally wouldn't have been able to. Later, I wanted to change the angle of the handlebars, so I watched this instructional video and did it - loosening and retightening the bolts with no problems. By contrast, I cannot even budge the bolt on a quill stem on my own. If threadless stems are generally easier to work on, then it's nice to have this bit of independence.

What's your view on the benefits or drawbacks of threadless stems? Do you see them as out of the question on classic bicycles?

Thursday, 24 March 2011

(elk)Hide I Seek

I get lots of questions about what handlebar tape I use on my mixte, so I've taken some close-ups. It's actually not tape at all, but elkhide sew-on city grips from Velo Orange. From a user's viewpoint, these are probably my favourite things to put on upright handlebars, because they feel the most comfortable to grip: not too hard and not to soft, just right. However, from an installer's viewpoint, they are kind of a pain to sew on and it takes forever. I've put them on two of my bicycles so far (the Royal H. and the Gazelle), each time thinking "never again!" while doing it. And yet, they are so comfortable, that I've just ordered another set.

The reason my elkhide grips look like bartape in pictures, is that I do have a layer of cloth tape installed underneath the leather. Doing this provides extra padding without making the gripping surface too soft. And the texture of the cloth tape printing through the leather feels ergonomic to my hands.

My grips are "espresso," to match my brown Brooks B72. When you first get these, they are kind of a dusty brick colour and don't match the Brooks brown at all - but they do once treated with Proofide (just install them first, then the Proofide).

As for the installation process... Let's just say lots of profanity was involved both times I sewed these on. VO recommends doing a 2-needle baseball cross-stitch, which is utterly foreign to me. After a half hour of unsuccessfully trying to figure out the instructions and undoing some very ugly sewing, I gave up and used my own stitch, which has held up pretty well since last September. Elkhide is a soft, almost buttery leather that weathers nicely and adapts to the shape of your grip - especially if you install it over a layer or cloth tape. Overall I find that it's worth it, despite the not-so-fun installation.

Monday, 14 March 2011

Component Porn... Film Noir Style

When we talk about "bike porn," all too often the attention is on the obvious stuff: the frames, the lugs, the cranksets, the handlebars. But what about the more subtle components? I know what you're thinking: I must be into some fancy, handmade, outlandish stuff. But I am really a girl of simple tastes at heart. Take, for instance, the little brass bell. Round, shiny and boisterous, I cannot get enough of these perfect little creations. All the world reflects in their polished surface, and they have seen everything your bicycle has seen. Sometimes I will be rolling along, and I catch a glimpse of the sky and trees reflected in my bicycle bell. How delightful to see my surroundings in miniature form, right on my handlebars.  

And then there is my excessive affection for the classic Sturmey Archer 3-speed trigger shifter. God, I mean look at it! Something about the shape, the font, and the overall design just says "stare at me, touch me, use me!" That little notch on the trigger so eager for me to shift gears. No other shifter has inspired such emotion within me. Am I being weird?

Although if you want weird, I will admit that I also have a thing for indicator chains. That's right:  those little bits of chain stretching from the hub. Oh how I yearn for glimpses of their jewel-like elegance - unobstructed by the horrendous plastic enclosures in which they are often housed today. Please, manufacturers: Free the indicator chains!

And I must not forget my longing for classic brake levers. I have tried to cope with standard modern ones, but how can I forsake the curves of these VO classics? The gentle tapering and the ball at the tip... A cold sleek modern lever cannot hope to offer the same tactile experience.

With all of these things now installed on the same bicycle, the overall effect is overwhelming. And it makes me realise that I am more taken with the looks of simple 3-speed components than with anything more complicated. Having a visible indicator chain on a hub is more important to me than the kind of derailleur I use, and my preference for the trigger shifter is by far more passionate than my admiration of bar-ends on roadbikes. Give me a classically outfitted 3-speed, and I will swoon with delight. What is your component porn of choice?

Thursday, 10 March 2011

Wood You?

Anybody a fan of wooden handlebar grips? I've been attracted to them for some time and have seen a few on vintage and custom bikes, but have not tried riding with them. I requested these from Bella Ciao, and they sent me a set to try along with a bundle of other stuff for the Superba prototype. The grips are handmade in the EU and Bella Ciao carries them as a special order item. Not sure whether I will actually use these on the Superba, but I wanted to see - and more importantly feel - what they were like.

Here is what the grips look like on a set of handlebars. They are not fancy, but they are classic, nicely finished, and ergonomically shaped. I don't know about Italian city bikes, but I think they would be great on a path racer with upside down North Roads.

I don't know whether I will like these in practice, but in theory I think they could work nicely. While modern bikes tend to come with heavily padded grips, over time cyclists can discover that they prefer a harder gripping surface. That may sound counterintuitive, but padded grips can tense up the hands, whereas hard grips can allow hands to relax. Still, it's possible that the wood could be too hard. I am also curious how well wooden grips hold up in the rain and humidity: Do they swell, crack or distort? Some of the vintage ones I've seen have been quite worn, but did not show any signs of cracking or warping.

Aside from Bella Ciao, there are a few manufacturers who sell different versions of wooden grips, including Dia Compe and Cardiff. I remember Rivendell used to offer some last year as well, but I no longer see them on their website. There were also wooden grips shown at NAHBS a couple of weeks ago, according to this picture via BikeSnobNYC. If you have experience with any of these or others, I'd like to hear about it.  I will be installing mine over the weekend and will make it a point to test them on a long ride, leave them out in the rain, and otherwise abuse them to see how they behave in comparison to other types of grips.

Monday, 22 November 2010

Colour Theory for Bikes

As someone who deals with colour all the time - taking pains to get it "just right" for paintings and photography setups - I am fascinated by the role of colour in bicycles. Choosing colour is not just a matter of "what matches what." It is a matter of understanding the psychological mechanisms involved in human colour perception and processing - which to me has always been interesting. But taking it down a notch from the realms of art-speak and neuro-psychology, here are some thoughts on colour choices as they pertain to setting up bicycles:
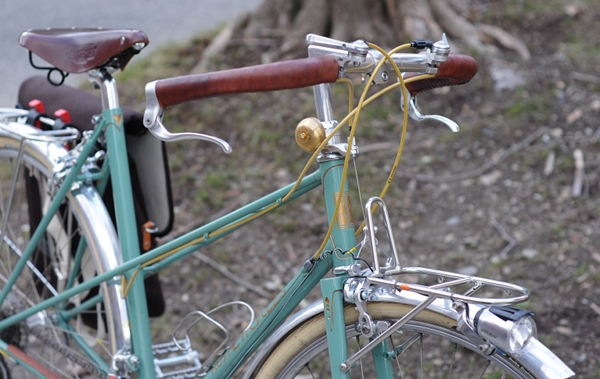
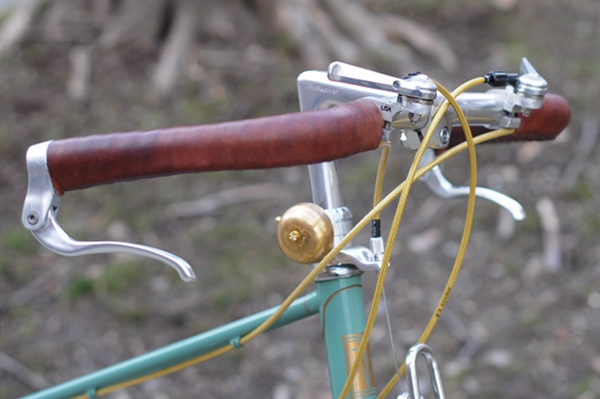
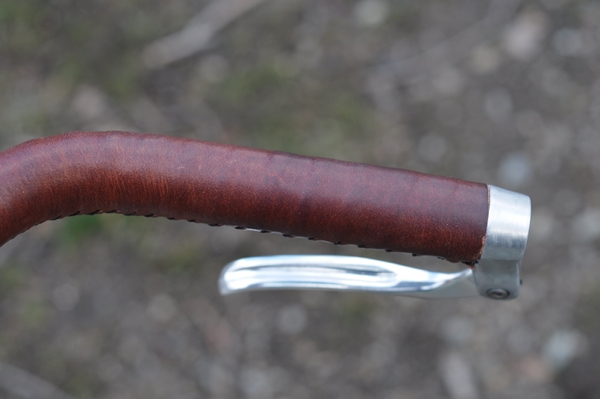
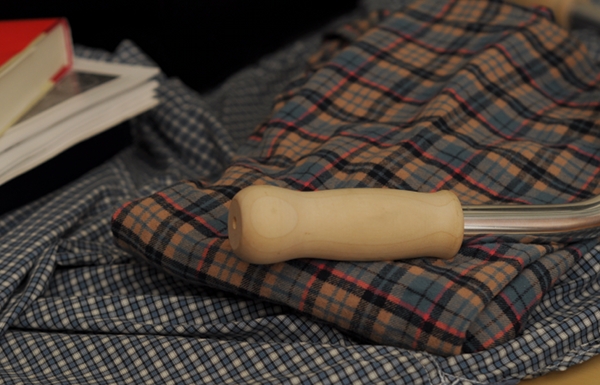
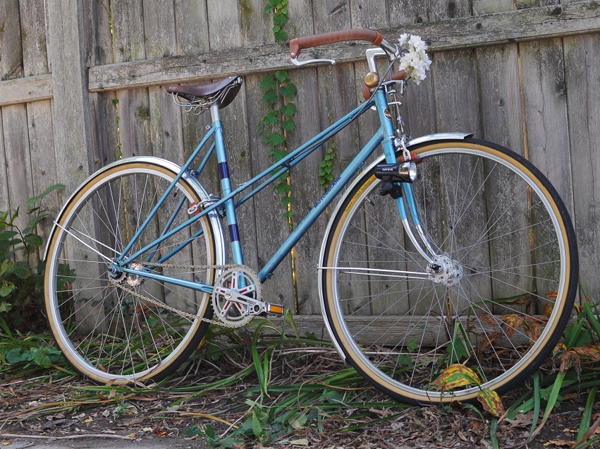
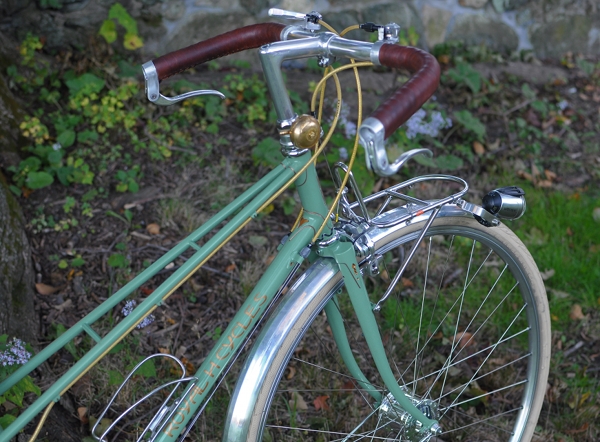
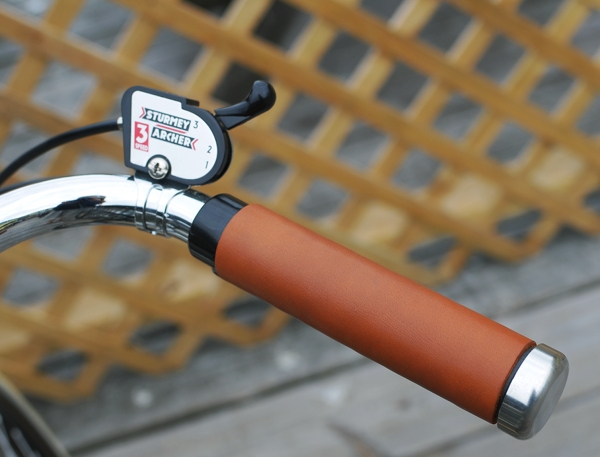
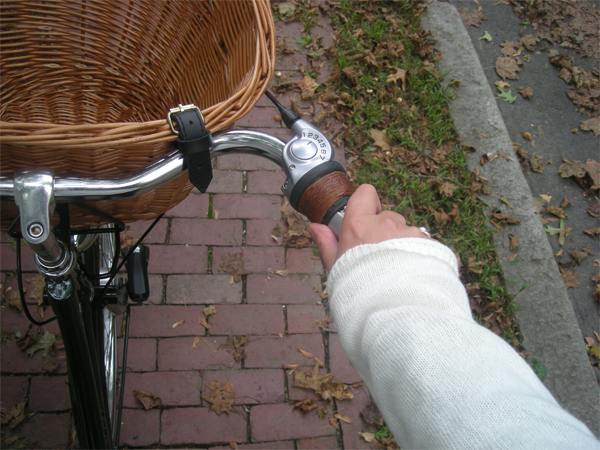
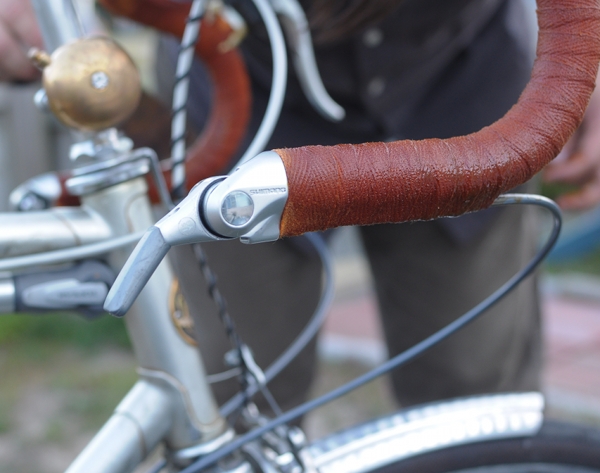
Handlebars and saddle
My go-to standard for handlebars and saddles is the brown family. The reason I like to use brown as opposed to black, is that brown enhances the colour of the bicycle frame, whereas black tends to "deaden" it. Being neutral, brown will not compete with the frame colour, just as black will not. But it will make the colour more vibrant, more emphatic - whereas black will leave it flat.

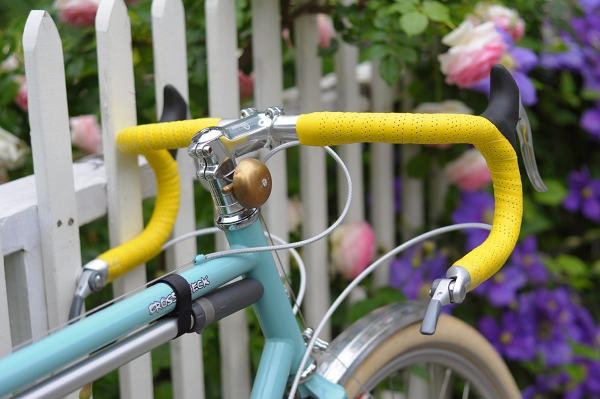
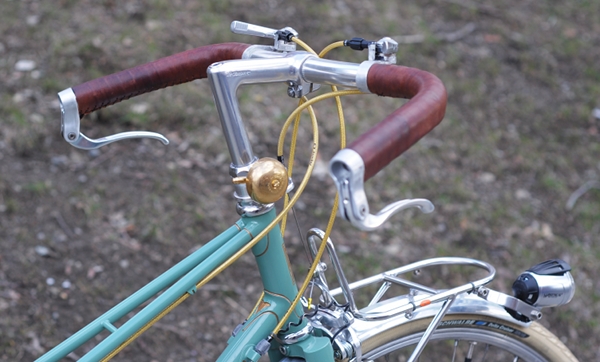
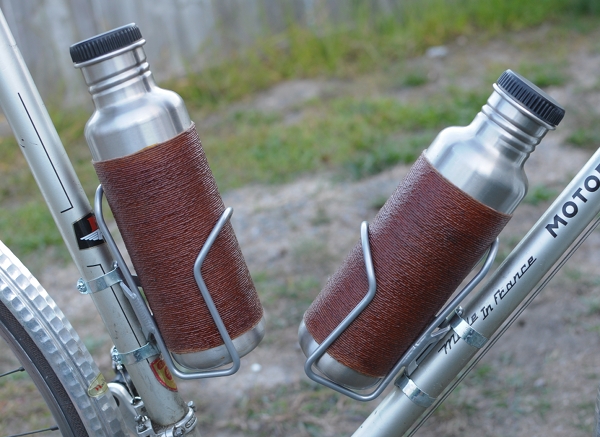
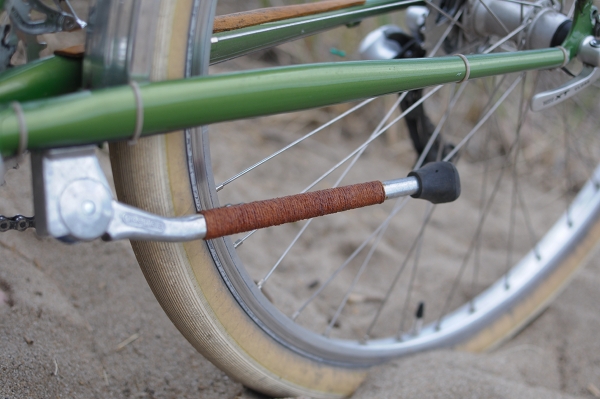
This works especially well on "cool" frame colours - such as blue and silver. And using twine and bits of leather on other parts of the bike (chainstay protector, kickstand, waterbottle, saddlebag straps) will further enhance the "warming" effect.

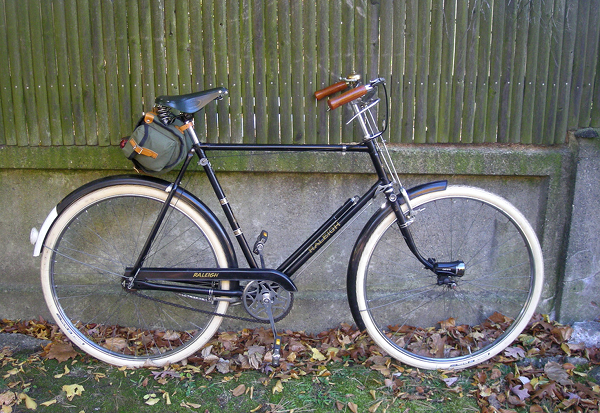
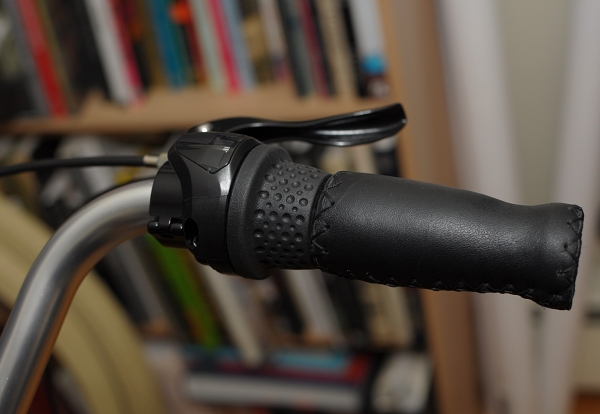
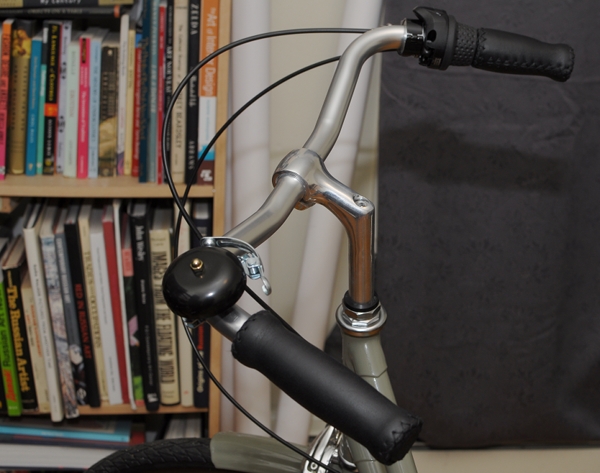
Brown can also make a black frame look less intimidating and more "personable" - as well as bring out the details in what would otherwise be an expanse of black-on-black.

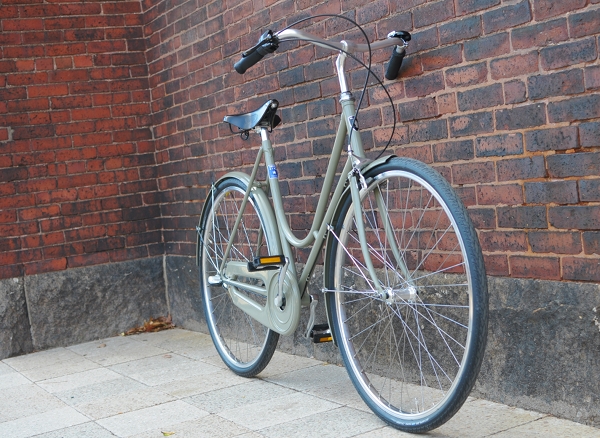
But of course, black has its place as well. Black accessories make a bike seem more aggressive - which can look good on some bicycles. And depending on the "personality" of a particular bike (lady's military bike?), you might not necessarily want the frame colour to be overly vibrant.

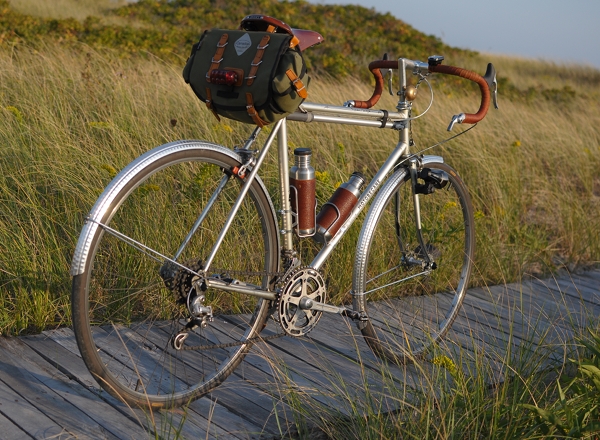
And when it comes to 
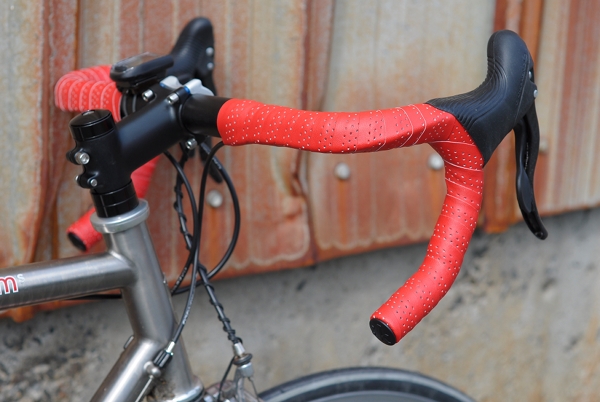
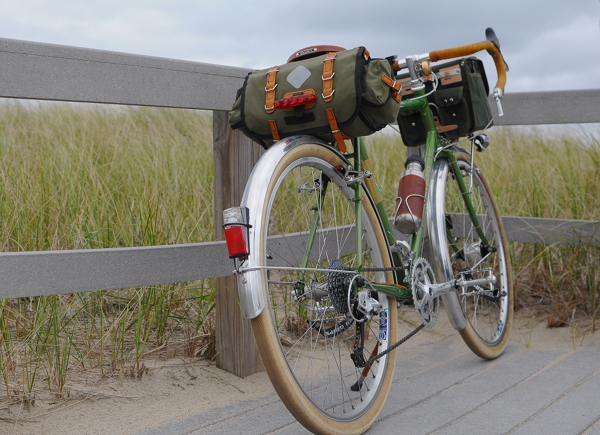
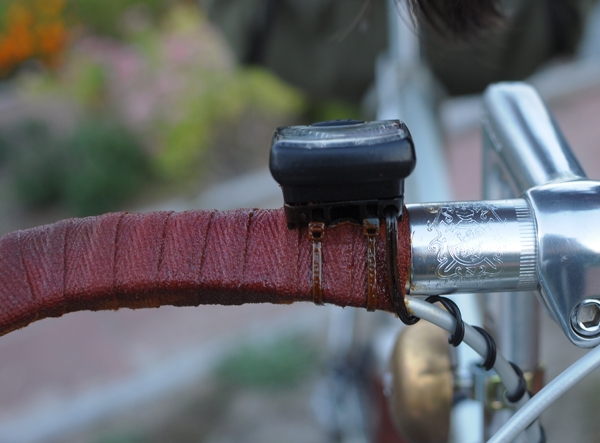
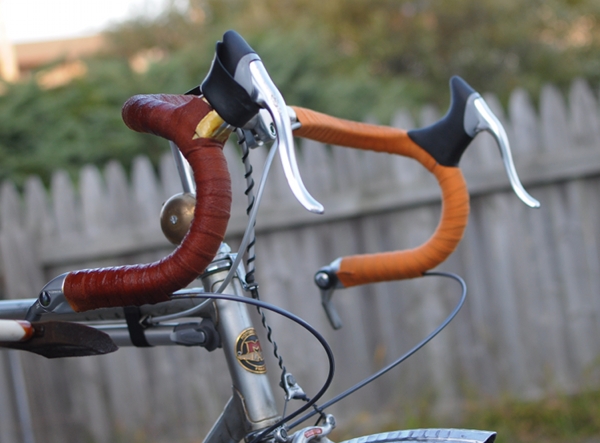
racing bikes, an aggressive or sporty look is usually more fitting than an "earthy" look. This can be achieved either with black, white, or brightly-coloured saddle and tape combinations (ideally in a contrasting colour to the frame). Bright and high-contrast colour schemes are exciting and suggest high energy, fast movement. If that is what you want your bike to communicate - go with it. And if not, you can tone it down with browns and neutrals, as I have done to this bike.

Tires
It goes without saying that performance and not colour should be the first consideration when it comes to tires. But assuming that you can get equally well-performing tires in a variety of colours, it can be nice to play around with that element as well. While I do not hide my crazed preference for cream tires, I do not suggest that they are "the best" option.

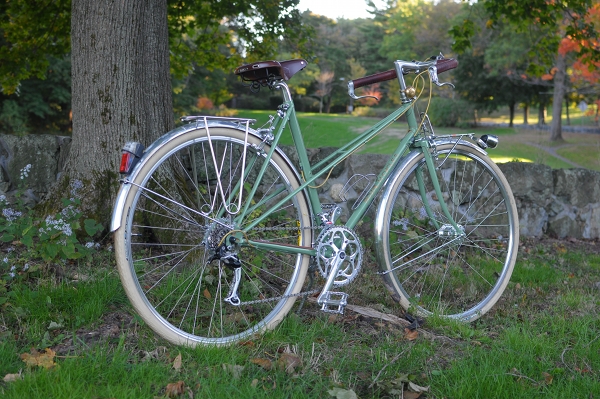
Cream tires can look elegant if you are going for a delicate look and have taken pains not to include any black on your bike. Here they make the bicycle look a lot more "serene" than had I used other tire choices.

And they can also look elegant as a contrast to the frame. But there comes a point - and for some it arrives much sooner than for others - where cream tires can be just too much and overwhelm the rest of the bike (I think that here I am dangerously approaching that). I also don't think that cream tires look good on a cream or white bicycle. It is too low-contrast and reminds me of "ghost bikes." Achielle does the cream-on-cream look better than others, and if you go in this direction adding prominent brown accessories to break it up a bit is the key.

A good, traditional option if you are looking for classic tires, are "gumwalls" - which are tires with back tread but tan sides. The tan fits nicely into the "organic" saddle and handlebar colour scheme, without the tires competing with the rest of the bicycle for prominence. I also like it how the alloy rims, the tan sidewalls and the black tread create the visual impression of 3 circles, one inside the other.

Bags and accessories
I am very conservative when it comes to bicycle "luggage," so perhaps I am not the best person to ask about this one. Mainly, I don't like it when bicycle bags are too distinct in relation to the bicycle itself - whereas the trend now (especially for accessories targeted at women) seems to be brightly coloured luggage with prominent graphics. It's not that I am "against" flowers, polka-dots, curly-cues, and the like. It's more that I want my bicycle to be the main focal point and not the bag. So I prefer to get subtle, classic accessories in neutral colours. As with saddles and handlebars, I think that the brown/olive family works well for a nature-exploring sort of look, whereas black works well for a more aggressive or racy look.
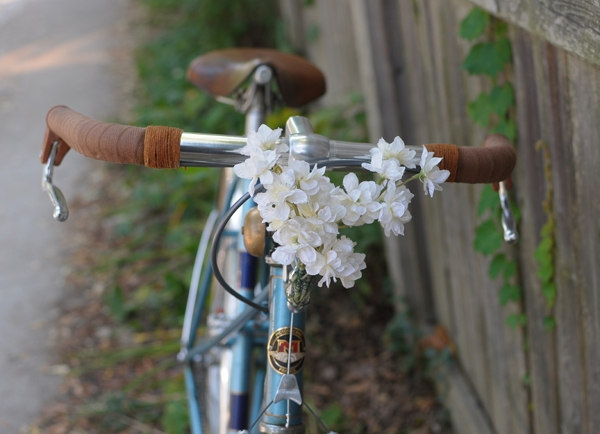
Decorations
Unless intentionally using decorations to distract from the rest of the bike, the colour of the decorations should not stand out too much from the other colours on the bicycle. Otherwise, the eye will get drawn to the decoration itself, with the rest of the bike an afterthought.

Frame Colour
If you are getting a bicycle frame re-painted, or are trying to choose a colour for a custom bike, the colour selection is of course a matter of personal preference. But based on my own experience (and conversations with others), keep a few things in mind:

1. Speaking very generally, super-bright colours work better on sporty bikes, whereas subdued colours work better on touring and transportation bikes.

2. True white is very harsh and almost never looks good. Even if a bicycle you like appears white to you, the actual colour is almost definitely a pale cream, a very light gray, or an off-white. Think twice before asking for a true white paintjob.

3. If you are getting the paintjob (especially powdercoat) done at a "budget" type of establishment, beware of asking for metallic colours. They are easier to mess up, and flaws in them are more visible than with regular colours. Flaws in lighter colours are also more visible than flaws in darker colours.

4. Prepare yourself for the fact that the colour never, ever looks the same on the bike as it does on the tiny colour chip, let alone on the online colour sample. I have seen some pretty amazing discrepancies, where after the person spends a month wringing their hands about the "perfect" shade, the colour on the bike does not even look like the same colour family as the chip they chose. One thing you can do, is give the painter a sample of the colour you want and ask them to find the closest match. They have experience with the way the colours actually looks on a bike. Alternatively, you can find out the colour code of a bike you like, and ask for that exact one.

There are those who take bicycle aesthetics very seriously and start to pull their hair out in despair if they cannot find the exact shade of orange handlebar tape they wanted. And there are those who could not care less about the details, and just use whatever components and accessories are available. I see myself as somewhere in the middle, leaning perhaps just a tad towards the former. (What? You think it's more than just a tad?...) While I enjoy setting up my bicycles in a way that is aesthetically pleasing to me, I do it quickly and intuitively, without dwelling on it too much. Then I ride the bike and get it filthy beyond all recognition - which is part of the fun, at least for me.

Saturday, 13 November 2010

Pulling the Trigger vs Doing the Twist: Thoughts on 3-Speed Gear Shifters

On bicycles with internally geared hubs, we typically see two types of gear shifters. The trigger shifter (pictured above) is a small gadget with a lever that is moved up and down. Today, this style of shifter usually accompanies Sturmey Archer hubs (though in Europe I have seen some lesser known models as well).

The twist shifter (pictured above) is a plastic and rubber enclosure that is built into the handlebar grip itself. To switch gears, you grab the rubber part and twist forward or backward. This style of shifter usually accompanies Shimano hubs.

After using both types of shifters on various bicycles I've owned to more or less the same extent, I have developed a strong preference for trigger shifters. When I tell people this, they tend to assume it has to do with "vintage aesthetics" - but actually, it has to do with comfort. A trigger shifter takes up very little space on the handlebars, as it is attached with a narrow bracket. This means that the shifter does not interfere with the gripping area, and allows me to install full-length grips on the handlebars.

By contrast, having a twist shifter installed effectively cuts your gripping area in half. Notice that the right handlebar grip on the Bella Ciao above is shorter than the left grip - necessary in order to make room for the shifter. Granted, you can also keep your right hand on the rubber portion of the shifter itself - but it's not very comfortable, especially as there is a tactile break between where the real grip ends and the shifter begins.

But why is it important how long your grips are, as long as you are able to fit your hands on them? The reason, is that having room to move your hands around on the handlebars, even a little, can be essential for hand comfort - especially on long rides. If you ride your bicycle for just a couple of miles or so at a time, then you might not get the urge to move your hands around. But the longer your ride is, the more fatigued your hands will get if you keep them in the same position. Some people are more sensitive to this than others, and those who have nerve damage in their hands (like yours truly) are particularly prone to it. The feeling can range from numbness, to "pins and needles" to a more severe sensation of electric current running through the hand. It is not good to experience this problem, and having room on the handlebars to move your hands around allows you to avoid it. Long grips can also help you switch between a more relaxed and a more aggressive position on your bike (by holding the grips further forward or further backward) - giving you some added control over speed.

Getting back to shifter styles, here is my right hand on the shortened grip that is integrated with the twist shifter on my Bella Ciao. As you can see, my hand covers the entire grip, with no room to move around - unless I place it on the shifter itself, though even then it is limited. And I had the same problem with this shifter on my previously-owned Pashley, which came with the 7-speed Shimano hub I innocently selected.

On the other hand, here is my hand on the grip I installed on my Gazelle. As you can see, there is room for another handful - which is only possible because of the trigger shifter.

I will note that one benefit of the twist shifter, is that it is more integrated with your hand position - which can be a plus if you switch gears very frequently. But on bicycles with internally geared hubs - especially 3-speeds - I have found that I tend to stay in one "ideal" gear most of the time, switching to a lower gear only when going uphill, and switching to a higher gear only when cycling very fast or downhill. Having to reach with my finger to pull the trigger has not caused me any inconvenience in comparison to using the twist shifter. Your experience, of course, may differ.

While I am not suggesting that everybody ought to run out and demand trigger shifters with their 3-speed bicycles, I am hoping that this comparison will provide some food for thought to those who are getting a new bike, or deciding which hub to select with a new build. I would also like to ask whether anybody knows where I can find a trigger shifter that is compatible with a 3-speed Shimano Nexus hub? Even if it involves rigging something up with a "thumbie" derailleur-style shifter, I am up for it. Thanks in advance for any advice.

Wednesday, 15 September 2010

Shellac: Why and How?

With the rise of the "classic bicycle aesthetic" it is becoming increasingly popular again to shellac handlebar tape, cork grips and twine. Obviously I love the trend. But I also think that people ought to be aware that the purpose of shellacking is predominantly practical, not aesthetic.

Shellac is an all-natural natural sealant (derived from the secretions of a Thai insect), which makes it perfect for waterproofing wood and cloth. When you cover your handlebars in cloth tape, two things will happen to them over a surprisingly short time period:  They will get dirty from your hands rubbing road dust into them, and they will get soggy from rain and sweat - which can cause the tape to distend, discolour, and even rot eventually. Shellac will form a protective layer that will prevent this from happening.

At this point, we have applied shellac so often and to so many bicycles, that we have gone through 3 cans of the stuff in a year and a half. For those interested, here is how I like to do it:

. I use a 1" foam brush, rather than a real paintbrush. A paintbrush can leave visible brush strokes, whereas a foam brush makes it easy to quickly put down an even coat. Also, because shellac is difficult to wash out, it is pretty much a given that you will ruin paintbrushes with it. Ruining a foam brush is less costly.

. I like to apply shellac in thin layers, rather than oversaturating. This way it dries faster, and I have better control over the thickness.

. Because I like to feel the texture of my bar tape, I am careful not to go overboard with the shellac application. If you apply so much that your bars feel glassy and hard as a rock, they might not be so comfortable to hold. If you find that you've accidentally done this, try going over it with steel wool or fine grade sandpaper to restore some of the texture.

. Since I ride my bike often and in bad weather, I re-shellac on a fairly regular basis. The shellac tends to wear off first in the spots where I keep my hands the most. When I notice this, I know it is time to add another thin layer.

. Shellacking the night before I plan to ride the bike usually leaves sufficient drying time - but doing it at least 24 hours beforehand is safer. Once or twice, I've ended up holding my hands on the hoods during an entire ride, because the bars were still not 100% dry.

Twine requires shellacking for similar reasons as bar tape: If left in its natural state, it will unravel over a short time period from friction and moisture.

Because of their distinct look, it is understandable that shellacked tape or twine on a bicycle can be seen as a fashion statement. But while I am happy it looks nice, for me the practical benefits far outweigh this aspect. If it were not for shellac, I would destroy my cloth tape on a regular basis. And in case you are wondering - Yes, of course we brought shellac to the Cape! The Co-Habitant has finally replaced his Motobecane's stem shifters with Shimano bar-ends, and we re-did his tape as the sun was setting over the beach next to our house.

Ping Blog

Step 1
Blog URL:


Blog Title (optional):


Blog RSS Feed (optional):


I agree with terms of service.

Step 2
Copy the following code and put it on your blog/site to help our blog ping tool track your submission (Need help?):
;

 
Design by Free WordPress Themes | Bloggerized by Lasantha - Premium Blogger Themes | Best Buy Coupons