


 12:20
12:20
 kaniamazdar

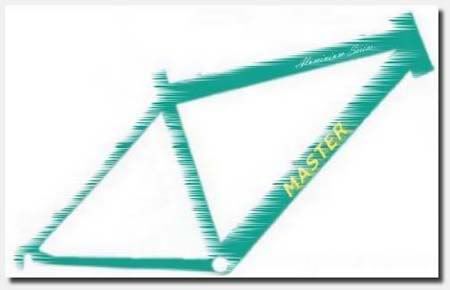
PALING DISAYANG. Liyang adalah brand mountain bike buatan Taiwan pertama yang masuk pasaran USA. Mungkin atas pertimbangan komersial, Liyang masuk Indonesia dengan brand "Master". Pada masanya, Liyang Aluminium Series termasuk frame oversize yang paling ringan, karena pasaran sepeda Indonesia saat itu masih didominasi frame ukuran standard dari bahan besi dan chrome-moly.
Sepeda ini dirakit pertama kali tahun 1991 dengan groupset Shimano Deore 300-LX, dan berat keseluruhan hanya 10,5 kgr (Mk-1). Nasib menentukan lain, frame dicat dan dirakit ulang tahun 2006 dan kembali merambah medan cross-country (Mk-2). Masih dipertahankan, karena merupakan kesayangan diantara semua koleksi sepeda kami. Sangat nyaman, stabil dikendarai, dan untuk masa kini terhitung masih cukup ringan. Sungguh merupakan sebuah perjuangan untuk merakit kembali sepeda ini dengan parts masa kini, karena geometri frame yang sudah lewat jamannya.
Akhirnya tahun 2007 cat dikelupas (polished) dan tampilan berganti, seiring dengan difungsikannya sepeda ini untuk commuter, untuk dipakai bagi kegiatan sehari-hari (MK-3). Beberapa parts terutama drive-train kembali menggunakan beberapa produk lama. Jadilah sepeda yang sudah mengarungi beribu-ribu kilometer ini tetap menjadi pekerja keras.
Mk-1 (1991)
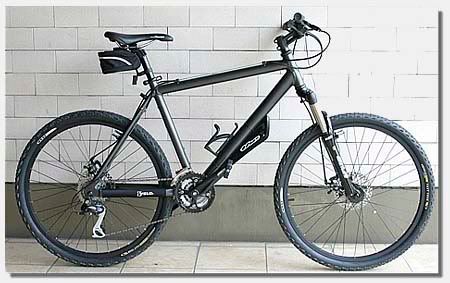
Mk-2 (2006)
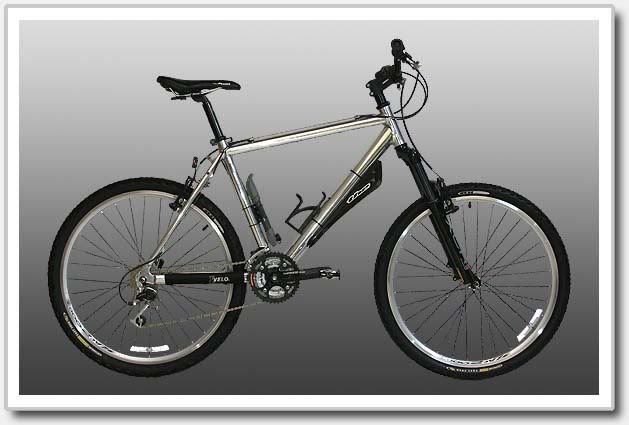
Mk-3 (2007 sampai sekarang)
Spesifikasi :
Frame : Liyang Al-3000 Aluminium Series
Frame year/First built : 1991
Last built : 2007
Frame type : hard-tail (originally rigid)
Frame size : 18 inch
Utility : Commuter
Color : aluminium exposed
Forks : RockShox Pilot XC-Air
Front derailleur : Shimano Alivio FD-M410
Rear derailleur : Shimano Exage 300-LX RD-M300
Shifters : Shimano Deore XT 7S 2nd. generation SL-M732
Crankset : Shimano Deore Hollowtech FC-M530, modified to 42T/32T/22T
Cassette : Shimano Deore XT CS-HG70 (7-speed)
Chain : Shimano HG-53
Bottom bracket : Shimano Deore BB-ES30
Pedals : Wellgo LU-998
Brakes : Shimano Deore BR-M530S (V-brake)
Brake levers : Tektro Sensir
Handlebar : Amoeba Borla
Stem : Zoom
Grips : Velo D2 VLG-609
Headset : non-branded
Seat post : orig.
Saddle : Velo Plush
Hubs : Suntour XCR (front), Shimano Deore XT RH-M732 (7 speed)
Rims : Weinman ZAC-2000
Tires : Schwalbe Racing-Ralph
Cables : Jagwire 4.0, Shimano
Accessories : Lotus (bag), Cateye (bottle cage), Eiger (tail light), Velo (chain guard), THE Sports-Line (shroud), THE cable-pros
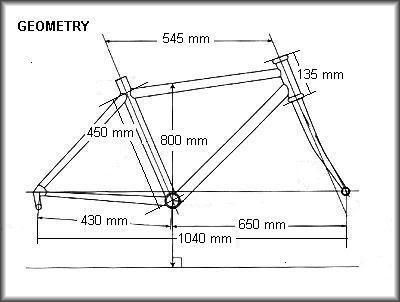


Sepeda ini dirakit pertama kali tahun 1991 dengan groupset Shimano Deore 300-LX, dan berat keseluruhan hanya 10,5 kgr (Mk-1). Nasib menentukan lain, frame dicat dan dirakit ulang tahun 2006 dan kembali merambah medan cross-country (Mk-2). Masih dipertahankan, karena merupakan kesayangan diantara semua koleksi sepeda kami. Sangat nyaman, stabil dikendarai, dan untuk masa kini terhitung masih cukup ringan. Sungguh merupakan sebuah perjuangan untuk merakit kembali sepeda ini dengan parts masa kini, karena geometri frame yang sudah lewat jamannya.
Akhirnya tahun 2007 cat dikelupas (polished) dan tampilan berganti, seiring dengan difungsikannya sepeda ini untuk commuter, untuk dipakai bagi kegiatan sehari-hari (MK-3). Beberapa parts terutama drive-train kembali menggunakan beberapa produk lama. Jadilah sepeda yang sudah mengarungi beribu-ribu kilometer ini tetap menjadi pekerja keras.
Mk-1 (1991)
Mk-2 (2006)
Mk-3 (2007 sampai sekarang)
Spesifikasi :
Frame : Liyang Al-3000 Aluminium Series
Frame year/First built : 1991
Last built : 2007
Frame type : hard-tail (originally rigid)
Frame size : 18 inch
Utility : Commuter
Color : aluminium exposed
Forks : RockShox Pilot XC-Air
Front derailleur : Shimano Alivio FD-M410
Rear derailleur : Shimano Exage 300-LX RD-M300
Shifters : Shimano Deore XT 7S 2nd. generation SL-M732
Crankset : Shimano Deore Hollowtech FC-M530, modified to 42T/32T/22T
Cassette : Shimano Deore XT CS-HG70 (7-speed)
Chain : Shimano HG-53
Bottom bracket : Shimano Deore BB-ES30
Pedals : Wellgo LU-998
Brakes : Shimano Deore BR-M530S (V-brake)
Brake levers : Tektro Sensir
Handlebar : Amoeba Borla
Stem : Zoom
Grips : Velo D2 VLG-609
Headset : non-branded
Seat post : orig.
Saddle : Velo Plush
Hubs : Suntour XCR (front), Shimano Deore XT RH-M732 (7 speed)
Rims : Weinman ZAC-2000
Tires : Schwalbe Racing-Ralph
Cables : Jagwire 4.0, Shimano
Accessories : Lotus (bag), Cateye (bottle cage), Eiger (tail light), Velo (chain guard), THE Sports-Line (shroud), THE cable-pros


