My conversion of the Mercier mixte to a 5-speed is pretty much complete, and it worked out nicely. I've received some questions about the process since I first mentioned my plan to do this, so I include answers to these questions here. What is a 5-Speed Conversion?
A 5-speed conversion refers to transforming a vintage 10-speed bicycle into a 5-speed by removing one of the two front chainrings and the front derailleur system (see before and after pictures above). In the end, the bicycle is left with a much simpler set-up of 5 chainrings in the rear, 1 chainring in the front, and a single gear shifter. It works much the same as a 5-speed hub, only the gears are visible rather than hidden inside the hub.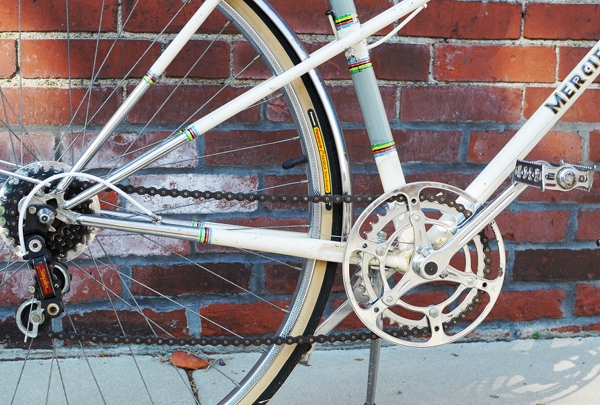 Why do this? Doesn't it mean you have fewer speeds now?
Hard question to answer, but I will try: The advantage of a derailleur over an internal hub, is that it allows for much wider spaced gearing. Riding the Mercier around hilly areas, I can get by perfectly well with just the middle 3 rear gears. The 2 extra rear chainrings provide a nice "just in case" buffer of one higher and one lower gear than I'd ever need, but the second front ring (which provides 5 additional speeds) and the whole front derailleur system (which switches between the two front rings) are useless entirely in the context of where and how I plan to ride this bike. Given my certainty of this, converting it to a 5-speed made sense, because it would simplify the handling of the bicycle and it would get rid of extraneous components. Also, this bike (as many older French bicycles) was originally designed to have a rear-only derailleur system. This is evident, because it has a braze-on (on the downtube) for just a single gear shifter. So converting it to a 5-speed reverts to a traditional design.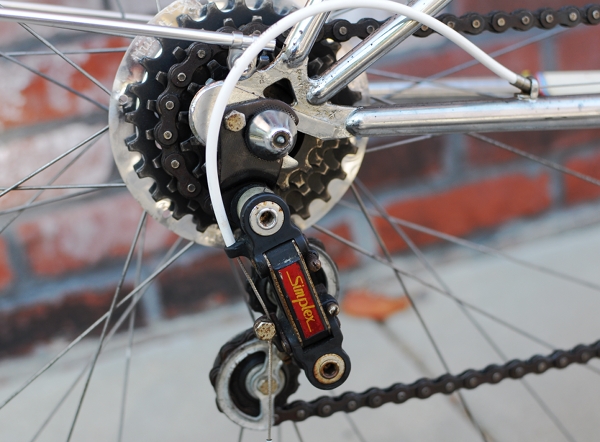 If you're going to make it a 5-speed, why not use a 5-speed hub and ditch the derailleur system all together?
The main reason, is that no existing 5-speed hub could give me the same customised, wide spacing as a 5-speed rear derailleur. It's not just about how many speeds you have, but how useful each of those speeds are. Additionally, it would cost a ton of money to rebuild the rear wheel with a 5-speed hub, whereas the 5-speed derailleur conversion was inexpensive. And finally, I am trying to keep this bicycle fitted with traditional components, and French bicycles were traditionally fitted with derailleurs.
How was the conversion done?
Keeping in mind that the process will differ depending on your current set-up, here is what generally needs to be done, step-by-step: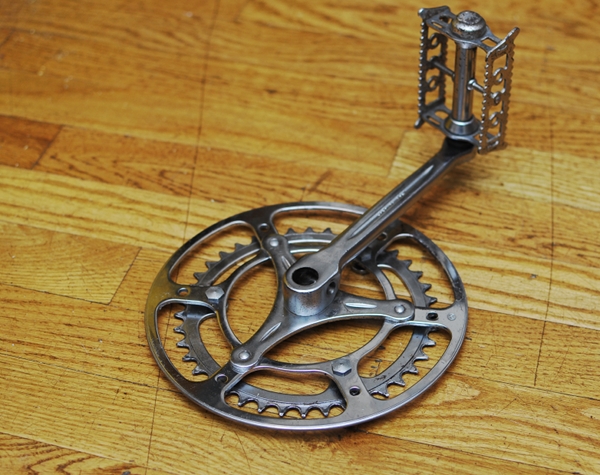 1. Front chainring removal
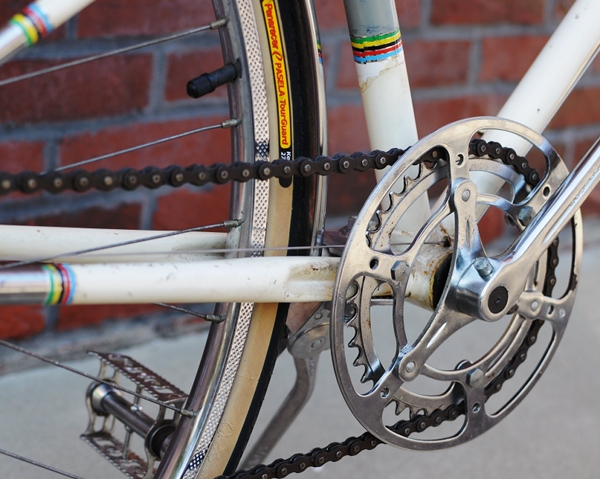
Since you will only have one chainring in the front now, you need to figure out how to get rid of the second one. The main issue here has to do with how the crank arm is attached to the ring(s). On some bicycles, it is possible to simply remove the extraneous chainring and the remaining chainring will hold up the crank. On my Mercier, the two rings are a unit, attached to the crank via a proprietary bolt system. To make a long story short, we could not simply remove the extra ring. Rather than get an entire new chainring and crank system, it occured to me that perhaps the teeth on the bigger chainring could be filed off - turning the ring into a chainguard. I discussed the idea with metalworker and bicycle mechanic Jon Gehman, who is a reader of this blog, and he agreed that this was a good way to go. I then sent him the chainring for a "de-toothing" service, and he did a spectacular job.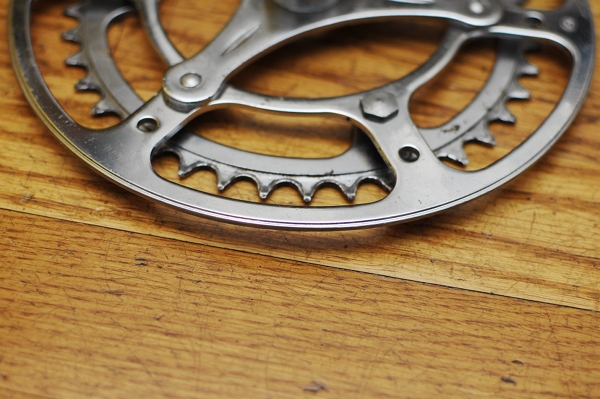 Here is a close-up of what was formerly the larger chainring. Notice how beautifully the edge is done - giving it a professionally finished look.
 2. Front derailleur removal
This was the easiest part. The Simplex front derailleur simply unbolts and removes. On the picture above you can see that the rainbow decal is a little worn where it used to be, but that is all.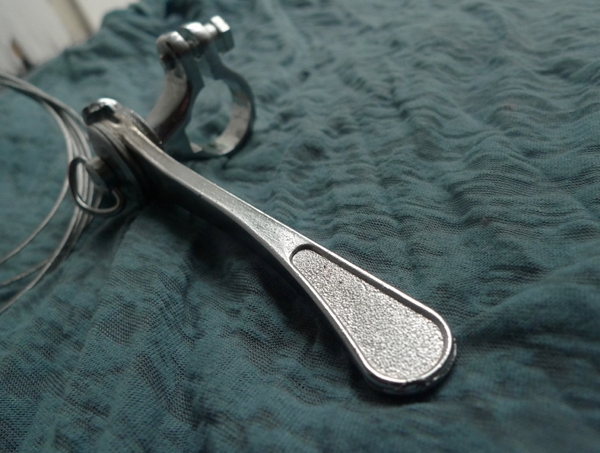 3. Changing the shifters
The ease or difficulty of this step depends entirely on what sort of shifters you have to begin with. If your bicycle has separate (unconnected) shifters for the rear and front derailleurs, then you simply remove the one that controls the front and you are done. If your shifters are a unit, then you will have to remove them and install a single shifter instead. Above is a vintage Huret single shifter for mounting on the stem that I bought for this purpose. It's beautiful, "period-correct", and can be bought fairly inexpensively. The Co-Habitant installed the shifter and connected the cable to the derailleur.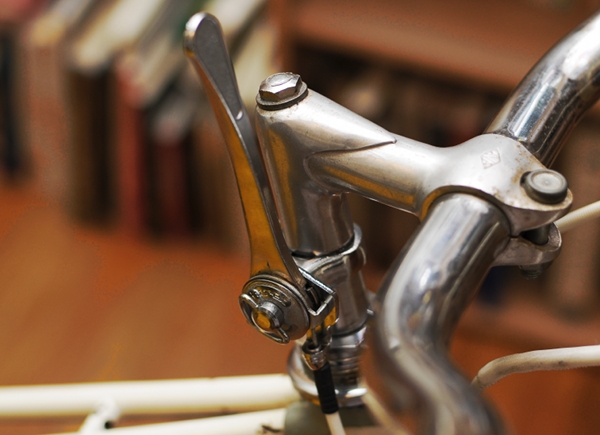 Here is the Huret shifter installed on the stem. I am not 100% sure though that this is the ultimate solution. Originally, the Mercier had downtube shifters, and this is where the single braze-on is located. However, I do not understand how one is supposed to use downtube shifters on a near-upright bicycle. At least for me, and in traffic, they were too much to handle - especially given that the shifting has to be done with the right hand.
 So now there is a cable stopper where the downtube braze-on is, and the cable then extends further to the stem. Though the Huret shifter is beautiful on its own, I am not sure how fitting it is here. For instance, the reason it is not all the way at the bottom of the stem, is that placing it here makes it hit the handlebar when it is moved all the way forward. Hmm, right? Your thoughts on this welcome.
Overall I am thrilled with the 5-speed conversion. The Mercier is light, easier than ever to handle, and now ready for its fate as Studio Bike. I admit that I am reluctant to send it over to the Studio and quite like having it here at home. But I also look forward to exploring a new neighborhood together... and to having less bike clutter in our apartment!
Friday, 7 May 2010
5-Speed Conversion!
Ping Blog
Step 1
Step 2
Copy the following code and put it on your blog/site to help our blog ping tool track your submission (Need help?):
;
 12:10
12:10
 kaniamazdar

 Posted in:


0 comments:
Post a Comment