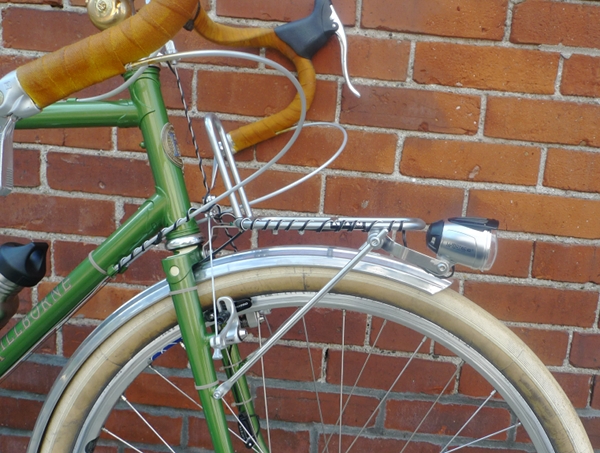
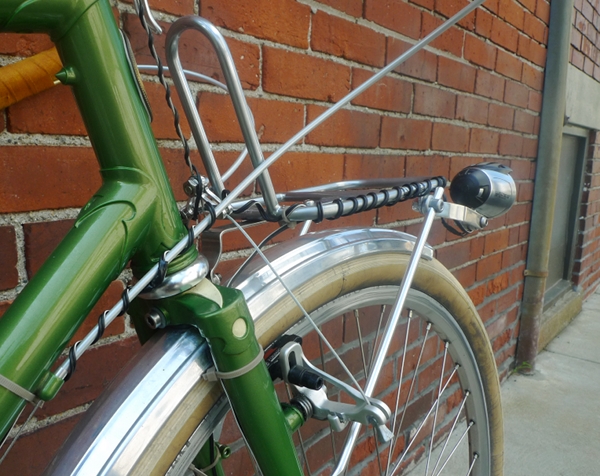
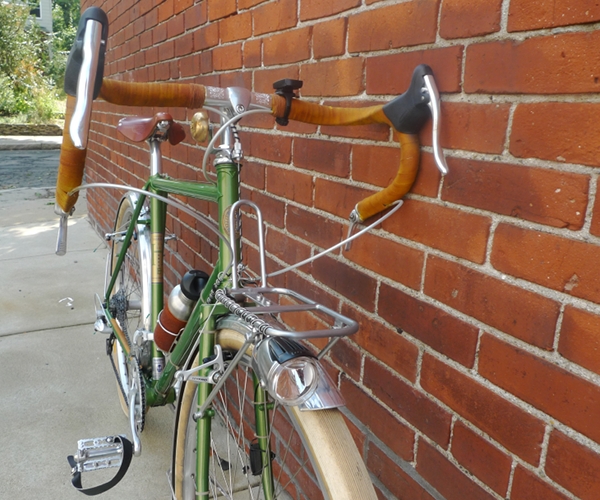
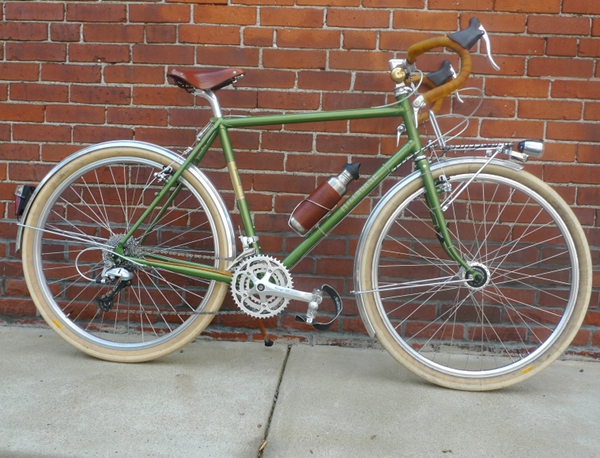
In preparation for the eventual acquisition of a handlebar bag, Graham has now been fitted with a front rack (Nitto M-18 from Renaissance Bicycles). I have been planning to purchase a front rack for a while, yet had no idea that there were so many choices and that the whole thing is so complicated.
To determine which front rack your bicycle needs, several things must be taken into consideration:
First off, do you want the rack to mount onto the fork, onto the brakes, or onto the front axle? Okay, easy enough. The fork on my Sam Hillborne has braze-ons for a rack, so I wanted the type of rack that attaches to them.
But the decisions do not stop there: If your bicycle's fork has braze-ons, is their placement compatible with the length and angles of the rack's stays? Some front racks have fixed stays and the placement of the braze-ons on your fork has to match them exactly. Usually this only works when a rack was specifically designed for a particular bicycle, or if a bicycle was custom-built with a specific rack in mind. After browsing rack models until my eyes got blurry and speaking to several bike shops, I was still unable to determine for sure whether any of the racks with fixed stays would fit the Hillborne and did not want to risk ordering them. Thankfully, there are also racks with adjustable stays (like the Nitto M-18 I got) that expand to accommodate the placement of the braze-ons on your fork.
But wait, that is not all: You must also consider your brakes. Even if the rack you choose does not mount onto the brakes themselves, it can be incompatible with a given type of brakes (in particular, cantilevers) due to clearance issues. Don't forget to check up on this!
Exhausted yet? I feel spent just writing about this! And I haven't even raised the question of aesthetics yet. If you look at the front racks closely, you will notice that some are square (like the Nitto M-18 in my pictures), while others are round. If you have a rear rack installed on the bike, it may be important to you that the two match - in other words, that both are square or both are round. So that is yet another design element to watch for.
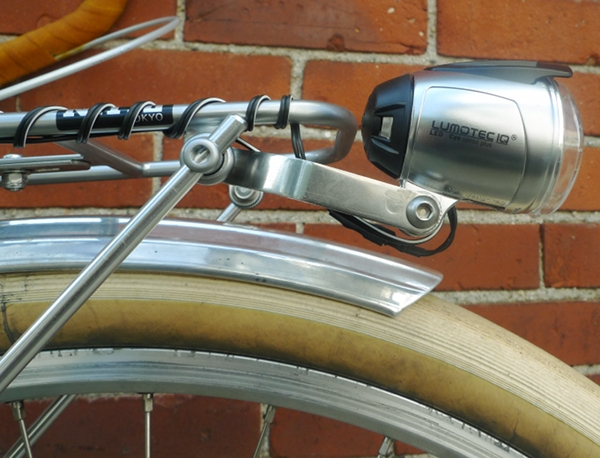
Last but not least, there is the question of light placement. Some racks are made with little braze-ons for mounting lights. The Nitto M-18 is not. So we bought a VO light mount - which is basically a small metal bracket with two holes. The size of the holes was not compatible with either the rack's or the headlight's bolts, so we had to drill them out.
With the light now successfully mounted, we are still not sure of this set-up. The bracket is made of relatively thick steel, but nonetheless vibrates slightly side to side (but not up and down) when the bicycle goes over bumps. The Co-Habitant does not think this is anything to worry about, but I am not sure that I agree.
I am also not sure how I feel about the garlands of wiring that now seem to cover the bicycle's front end like ivy. Once the handlebar bag is installed the wires on the rack will not be visible, but what about the section that curls around the shifter cable? All in all, I cannot say that this set-up can be called "elegant" and we are still considering alternatives. One thing I do like, is how far forward the light extends - this placement seems ideal for road illumination. Is it a matter of compromise, or is there a magical solution out there that I am overlooking?
...
Update: There, we fixed it!
We have successfully re-routed the wiring, so that it now runs straight underneath the rack instead of coiling around it.
The wires are considerably less noticeable this way, and I think the results are good. Thanks for everybody's comments and suggestions.
...
Update: There, we fixed it!
We have successfully re-routed the wiring, so that it now runs straight underneath the rack instead of coiling around it.
We have also titled the bracket down, placing the headlight a little further back, which should reduce the vibrations. I will remove the Nitto sticker when I get around to it.
"Aerial" view.
The wires are considerably less noticeable this way, and I think the results are good. Thanks for everybody's comments and suggestions.
 11:41
11:41
 kaniamazdar




 Posted in:


0 comments:
Post a Comment