 21:46
21:46
 kaniamazdar

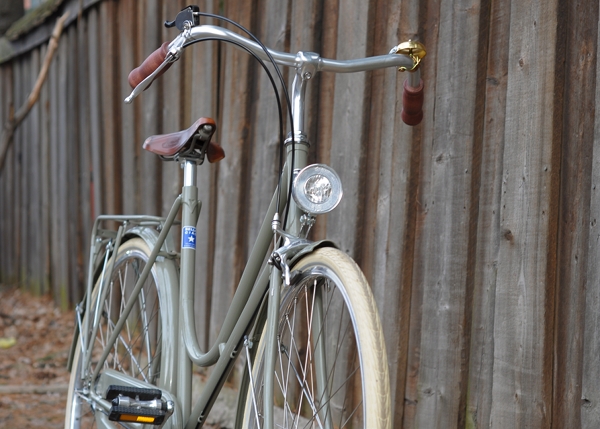
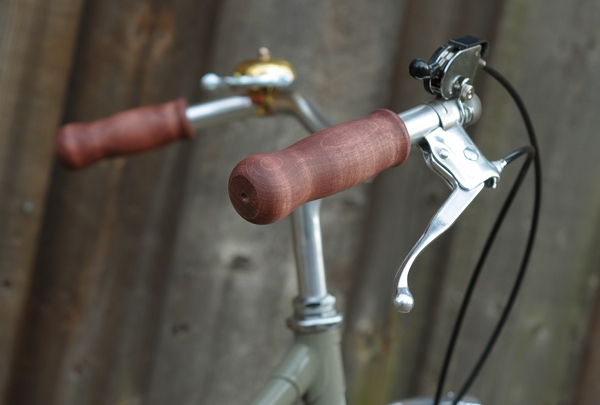
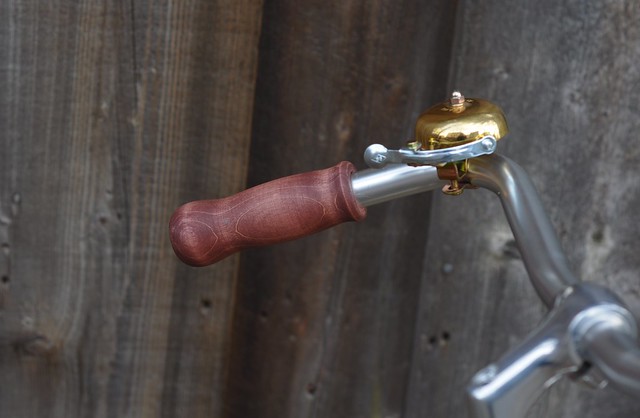
When I showed these pictures earlier, some of you noticed that the cork grips matched the bicycle's saddle and I explained that the grips were stained. Now I've done the same to my wooden grips, and will take this opportunity to describe the process for those interested.
What is staining?
Staining is inherently different from painting, in that the pigment gets absorbed into the surface, rather than sitting on top of it. This means that the natural texture of the material will remain prominent - the cork retaining its corkiness and the wood its woodiness. And unlike paint, stain won't crack.
Where to buy and what kind?
You can buy a small can of wood stain at any hardware store. There are many different kinds to choose from, all of which should work on both cork and wooden grips. I suggest choosing a stain that is oil-based, not water-based or synthetic. Oil-based stains permeate better, look more natural, and are more fade-resistant.
Choosing a colour
If you are looking for a natural colour that will match a brown leather saddle, the main thing is to determine whether your saddle has yellow, red, or ashen (neutral) undertones. For example, Brooks "brown" has a red undertone to it, whereas Brooks "honey" has a yellow undertone. Velo Orange brown leather saddles are more or less neutral. A wood stain that is described as either cherry, mahogany, or redwood, or contains anything "red" in the name will, as you might imagine, have red undertones. A stain that is described as pine, or oak, or contains anything "golden" in the name, will have yellow undertones. A stain described as walnut, driftwood or ash will have neutral undertones. If you are trying to match a black saddle, look for ebony. This basic range of stain colours should be available at most hardware stores.
Applying wood stain
Oil-based stains require ventilation, so you will need to apply the stain in front of an open window or outdoors. Stir the stain inside the container very thoroughly, as the pigment tends to separate and settle on the bottom of the can. Then apply stain to the grips using an inexpensive paintbrush. Apply very thinly. The stain should not be leaking off of your grips and you should be able to see the texture of the wood or cork through it at all times - remember that it's more like a dye than a paint: slowly work it into the surface, rather than attempting to paint with it. Wipe the excess off with a napkin or rag and stand the grips to dry on a newspaper. Don't worry too much if your application doesn't look perfectly even; if anything, that complements the natural variations in the material. There is really not a whole lot you can do to mess this up.
Allow at least 24 hours for the stain to dry, then decide whether you need another layer. For grips, one is usually sufficient. The more layers, the darker and more saturated the pigment will look. If desired, apply a layer of shellac after the stain is fully dry. The wooden grips pictured here are not shellacked, but the cork ones here are.
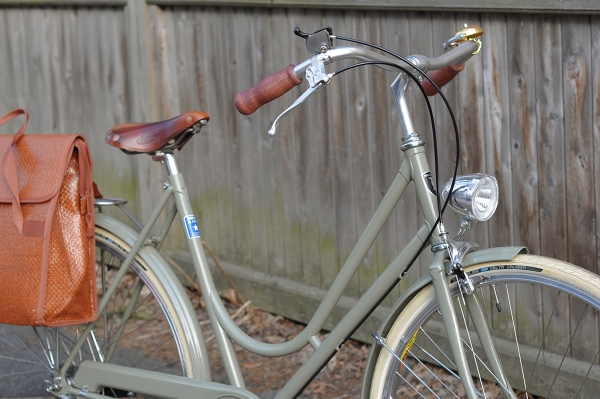
And enjoy your beautifully matching saddle and grips. A pair of plain cork grips will set you back $10, and a small container of wood stain an additional $5. It's a fun and simple way to spruce up your handlebars.
 Posted in: DIY,grips


0 comments:
Post a Comment