Showing posts with label paint. Show all posts

Wednesday, 23 September 2009

Here's a Surprise

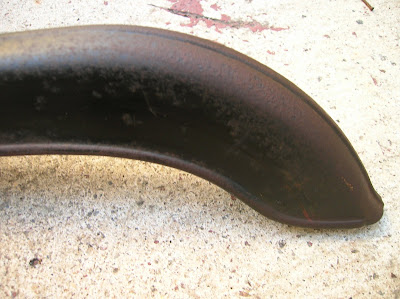
It turns out that the Phillips was originally a deep red, not black like I had assumed. The fork steerer tube gives a pretty clear indication that this was the original color. It seems, in fact, that the base coat was black with the red on top, which creates a rather striking and rich red. This could mean that the bike is not pre-war, since most specimens from the 1920s and 1930s seem to have been black. However, at least one pre-war Phillips that I know of had a rather more striking original color scheme. In other words, the color doesn't do much to help date the bike, but it certainly did come as a surprise to me.

Also, I've managed to scrape the yellow paint off the head badge. This will be black, red, and gold when finished, like this one.

Sunday, 22 March 2009

Huffy/Raleigh Decals

Okay, these photos are brutally honest. In fact, I will say that they make the final result look a good deal worse than it appears in person. On the first photo (down tube), you can see that in some places the original finish didn't take the clear coat so well. It looks like pitting, but it's just in the surface of the clear coat, not the paint itself. I'm still not very good at applying the clear coat sometimes, so this is probably user-error.

Other places, like this bit at the top of the seat tube (below), turned out very well. In fact, the whole seat tube came out looking quite good (see second photo below). However, I noticed the other day when I had the bike in the sun that I very thoroughly clear coated some of my dirty fingerprints onto the seat tube.  I thought I had the whole frame clean, but I guess I missed a spot. Fortunately, it's only apparent in the right light, from the right angle. I guess it'll help me positively identify the bike if it ever gets stolen!

The chain guard is a bit rougher, as I just did a bit of touch-up on the paint, then applied the clearcoat. It was also in worse shape to start with. I'll post some photos of it later, I forgot to get any of it when I took these. 

I picked up some cork grips from my LBS yesterday, and I've got the brakes on now. It's raining today, but I'll try to get another photo in the reassembly series posted in a few days.

Friday, 13 March 2009

Huffy/Raleigh Paint Finished

Well, I got my wish, and the humidity came down a bit today so I could do the clear coat. It's dry to the touch now, so I gathered up all (or most, anyway) of the parts and arranged them for the first of a series of reassembly photos that I'll put together into a slide show at the end of the process. I've included a couple of other shots to show the dramatic results of the painting. Hopefully, I'll get started on the reassembly tomorrow, although I've still got some last parts on order, so I won't be fully finished for a little while.

Here are the fenders, before photo here.


And the head badge/head tube, before photo here.

Thursday, 12 March 2009

Watching Dry Paint

My plans to finish the paint this week have been stymied by high humidity. I have the paint itself all finished, and it came out looking great, but I'm holding off posting photos until I get the clear coat on and the masking tape off. I want to wait for a good dry day to do the clear coat, since it can be finicky.

In the meantime, I'm cleaning what little I can access of the rear hub and greasing the bearings. I had intended to dismantle the hub and completely clean it, but there's a retaining ring that won't budge that has to come off in order to pull the whole internal works out of the hub shell. I've taken the sprocket off, and dumped the bearings out for cleaning, and what I can see of the other internal gizmos, it doesn't look too bad. I'll put some oil directly in there before closing everything up, and then some more via the oil cap when I'm ready to ride it. Hopefully that'll do the trick. I'm a little wary of this hub, since I was not able to ride it before starting the restoration, and I don't even know if it works. With my luck, it'll be completely buggered, and all this work will be for naught.

Friday, 6 March 2009

Watching Paint Dry

I'm at the penultimate stage in the Huffeigh work now, which is painting. I'm doing a full sand, prime, paint, and clear coat job on both fenders, the top tube, and the chain stays. The rest is just getting touched up. Shown here are the finished front fender, fork, and chain guard. A few days ago, I did the white portion of the rear fender, and today's task was priming the rest of it and masking off and priming the frame. I'd like to try to get the paint done on both this weekend or early next week. Then clear coat, a few more new parts to get together, and then reassembly.

I have to admit, the painting stage and all of its sub-stages is trying my patience. The end is so close now, I just want to be done! As with all things, however, patience is a virtue.

Monday, 23 February 2009

Huffeigh Front Fender Paint

This is after the first three coats, and I'll probably do another two or three just to be safe, then the clear coat. One thing I learned repainting the Columbia is that you should probably add at least two more coats than you think is necessary, and also that clear coat is best applied in many very light coats, or else it will run and/or crack. Anyway, I'm hoping to start making faster progress on the Huffeigh now, so it may not be too much longer before it's finished. Barring any unforeseen (but nevertheless inevitable) problems, that is.

Thursday, 5 February 2009

Huffy/Raleigh Chrome Update

I promised an update on how my super cheap-o chrome touch-up went. I didn't get everything done last weekend that I wanted to, but overall I would say that the silver paint solution is only partially successful. Here's a rust spot on the front hub before and after touch up with the silver paint sprayed on a paper towel.

Obviously, it doesn't completely match the chrome, but for just a couple dollars a can, what can you expect? After all, the idea is to make the rusty spots look better, not perfect.

The main problem, however, is that even when dry, the silver paint (and all readily available metallic spray paints, based on the customer reviews I've found online) rubs off very easily. After more than two days of drying in very low humidity, I still had a bit of silver on my fingers after handling painted items. My solution to this (hopefully) is going to be to clear coat all of the silver painted parts with spray enamel, essentially encasing the silver paint. I've experimented with this on the small nose cap on the front fender, and it seems to work. The real test will be whether it works on the brake lever, since I'm not keen on showing up silver-handed everywhere I go.

I'll add that I would not recommend this technique for folks intent on doing meticulous original restorations, or who are super-finicky about having everything look just so. This technique covers the rust, but if anyone looks closely enough, it's very obvious that it's just silver paint. Also, only time will tell how durable this solution is. That being said, I think it's going to be just fine for the Huffeigh, since it's going to be a working cargo bike, not a museum piece. 

Thursday, 29 January 2009

Sturmey-Archer Shifter Before/After

I thought I'd have a go at resurrecting the original trigger shifter on the Huffy/Raleigh instead of putting on a new one. I really like the name plate on this one, so I wanted to try to keep it. These were not made to be dissembled, so I had to use a cotton swab soaked with cleaner (actually, just rubbing alcohol) to get to the inside parts. I also used a small screwdriver and a toothpick to get way in there and chip the dirt and grit away. I'll put a couple drops of oil in there when I'm ready to put it back on, and it should be fine.

To clean up the outside, I used my usual combination of fine steel wool and light oil, followed by Brasso. I would have used RidingPretty's wonderful green cleaning techniques, but I had that part done several weeks ago before she guest-posted here. Finally, I used a bit of red and black craft paint on a paper towel to refresh the color on the lettering. I just applied the paint across the letters with a corner of the towel, then wiped away the excess from the surface. It's not perfect, but certainly looks better than it did.

Huffy/Raleigh Chrome Before

While I procrastinate putting the wheels back together and starting the sanding and painting, I'm going back through all the parts I have already cleaned and doing a second, more thorough cleaning and inspection. The brake calipers and levers are the pieces in the worst shape. These photos are after two cleanings with steel wool and oil, followed by rubbing compound and then polishing with a clean cloth. Trust me, this is as good as they're going to get:
 The only chrome bits on the bike that aren't bad are the crank arms and chainring. The stem and handlebars were quite terrible, and after my adventure with the stuck stem bolt, they've been replaced anyway. I'm going to try the silver paint trick for these and a few other once-shiny bits like the frame clips for the cables.

I found this in William Love's How to Restore Your Collector Bicycle (which is now out of print, darn it). Love is talking about cadmium or nickel-plated bits like fender braces, kickstands, etc., but I'm going to try it with chromed pieces. I figure they can't look any worse than they do now.

Good old "chrome" silver (shinier) or aluminum (duller) spray paint works wonders to touchup these...plated parts, but not necessarily by spraying them. First, wash and thoroughly dry all of the parts.... Spray the paint liberally on a paper towel, and rub the paint on the affected part.... The deteriorated portions are a bit rough compared to the rest of the surface, and the paint sticks to these areas while blending with the original surface nicely (Love p.64).

We shall see. This is probably going to be this weekend's project. I'll let you know how it works.

Friday, 23 January 2009

Huffy/Raleigh Paint Before

I promised a post on the condition of the Huffeigh's paint a while back, so here it is. The top tube and head tube definitely need to be done, as well as the chain stays and seat stays (sorry for the crummy photos).
The fenders too, and the chain guard. 
The down tube and seat tube just need to be touched-up in a few places, but not fully redone. I'm also considering the "silver paint trick" on the chromed parts that have lost their chrome, which includes parts of both brake levers, the brake calipers themselves, and a spot on the front hub. I'll definitely keep y'all posted about how that works and just what exactly I end up doing.

Monday, 5 January 2009

Huffy/Raleigh Cleanup

I've lost track of the number of days I've worked on this bike so far, so no more "Day 5", "Day 16", "Day 146" updates.

I've mostly been hard at work on the cleaning. I'm still waiting on a special-order lockring spanner wrench to get the bottom bracket apart, and in the meantime, I've taken down the front wheel and cleaned and repacked the hub. I didn't take photos of the process because cameras and bearing grease aren't a good combination in my less-than-capable hands, and I still haven't been able to hire that assistant (or housekeeper, for that matter). But here's an after photo of the front rim and hub, shown beside the rear wheel for a before/after comparison.

My project over the weekend was to completely clean and repack the pedals, which are in good enough condition to reuse. They were in such rough shape that it took me an entire afternoon, but I'm pretty happy with the result. The photo below shows the clean bits of the outer bearing assembly of the right pedal. More photos at my Flickr photostream.

Basically, all the other parts (except the rear wheel--I'll have something to say on that later) have now been cleaned once, just to see what I'm dealing with in the way of chrome and paint disintegration, and I'll be cleaning everything very thoroughly and meticulously again before reassembly.

The story isn't great for the chrome, which I'll post on later, but the paint isn't too bad. I won't have to repaint everything; the fork, for instance, is in brilliant condition, and most of the down tube is almost pristine. There are some trouble spots, however, where rust has done away with the paint almost entirely. For repainting, I've settled on the front and rear fenders, the chain guard, the top tube and head tube, and the seat stays and chain stays. All of the decals on the chain guard and frame will be preserved, however. Hey baby, I'm rollin' on a Huffy and I want people to know it! (that was some subtle sarcasm--for those who don't know, Huffy developed a rather poor reputation in the half-century since this bike was made).

Anyway, I promise more regular updates in the new year as I work on this project. I'm hoping to put everything back together and assemble all of my replacement parts by spring, but I'll also be finishing and defending my PhD dissertation between now and March, so I may drop off the edge of the blogosphere for a little while in late February. Just so you know.

Sunday, 30 November 2008

Day 1 & 2: Huffy/Raleigh Sportsman

The first shiny bits made their appearance today. I've got the wheels, fenders, chain guard, kickstand, etc. off the bike, but have left the handlebars/stem/fork assembled and the saddle and post on so that I can upend the bike to clean from all angles. I always clean everything first before I get too serious about the technical bits like bearings, crank, hubs, etc. Part of the reason is so that I can handle the bike without getting too dirty, and I also like the psychological boost I get from sprucing everything up. I washed the whole frame with Pedro's Bio-Clean squirted on a wet cloth, then went over it with rubbing compound to get a deeper clean and to coax what luster is left out of the paint. The fork and its chromed cap came out beautifully, but the head tube reveals the overall poor condition of the paint. The head badge turns out to be chromed copper, which explains the greenish hue it had. I made a go at the handlebars, and confirmed that much of the chrome is flaking off, but what remains shined up better than I expected; same with the stem. I didn't take a photo of that yet.

Tuesday, 9 September 2008

The Runwell: First Photos


Here's the "before" photo from the Craigslist posting, and the rest are from today--I'm finished! These didn't really turn out very well, and I'll post some better ones later, but I just had to put these up! Actually the rackafratzin' left pedal is still stuck fast, so I've still got that to work on. Right now, the right pedal is shiny and new, and the left is dirty and old. Otherwise, I'm incredibly pleased with how the polish went on, how the fenders turned out, and just really totally psyched about the whole package, actually! The rod brake works wonderfully, as does the coaster hub, and the saddle is the only thing that makes noise, and that just needs a bit of oil in some strategic places underneath.


Friday, 29 August 2008

The Runwell: Day, Uh, 13? 14?

Honestly, I've lost track of the days. I've been working on sanding/chipping the old paint off the fenders, and priming, painting, and top-coating them. I'm about half-way through that process now. I also gave the frame a rubdown with rubbing compound, which really brought out the shine and deepened the color. No more pictures of the frame or fenders (well, maybe the fenders) until I'm all done--don't want to spoil the suspense!  

My cork grips from Velo Orange arrived yesterday, and I promptly set about cutting them down so they would fit on the Runwell's smallish handlebars. Because I lopped about two inches off the end of each grip, I was left with open-ended grips that needed bar plugs (it was an aesthetic choice not to take the two inches off the already-open end of the grips). To match the color of the cork grips (and boost my DIY cred), I whittled two plugs out of some scraps of 1" wooden dowel I had laying around. 

I'll varnish these separately, then put the grips and plugs on the bars and varnish them both together to create a good water-tight seal. I'll be running to the bike shop this weekend to hopefully get my tires, tubes, rim tape, chain, and new spoke. Then, it's an order from Harris Cyclery of rod-pull brake shoes, new block pedals, and perhaps a new seatpost (to replace the original angled post that seats me too far forward). Once all that is assembled, I'll give the frame a couple coats of polish and I'll be done. I won't say when that will be, for fear of jinxing the whole operation, but soon, I hope.

Saturday, 16 August 2008

The Runwell: Day 8 1/2

File this under "echoes of former glory." While I (still) wait for my cleaning solution for the rear wheel to arrive, I cleaned up the fenders, which had gone untouched since I took them off on Day 1. In terms of dents and dings, they actually look better than I thought, but the paint is in sorry shape. What's worse, actually, on both front and rear fenders, there are small protected areas where the paint retains its original shine and even remnants of the gold pin-striping that used to be there. I'd almost rather not see how it used to look, actually, it makes me sad.

I had been thinking about just leaving the fenders off when I reassembled the bike, but now I'm thinking that sanding them, priming them, and spray-painting them gloss black can't be any worse than keeping them in their present state. I can already hear the howls of dismay from the purists out there, but I refer you to my earlier post on painting. Someday I'll have the bike professionally repainted and re-chromed, but I've got to get it up and running again first, and why not have some nice-looking fenders until then, right?
  

Monday, 12 November 2007

Surprise! Reassembly!

I had planned on doing the second clear coat today, and even started on it, but the first piece I coated (the front fender) got all bubbly and cracked and spotty-looking. I think I must have put on a too-heavy coat, but I decided not to push my luck with the other parts. So, instead of doing two coats of clear coat on everything, I'm calling it good with just one. Tomorrow, I'll buff off the botched clear coat on the front fender and then try to reapply it more smoothly. I put a coat of Turtle Wax on everything else, which will also act a protecting layer. Then, I took off the masking tape from the bearing cups and head badge and started putting the whole thing back together. As you can see below, I got the fork and handlebars, the seat, and the crank put back on the frame.

Nothing too technical here. I just put the seat back on so I could flip the bike over later to work on the crank, fenders, chain, etc.

Here's how I put the fork and stem on: 1) pack the bottom bearings of the fork and set on the bottom bearing race; 2) insert the fork into the tube and let the frame rest on the fork; 3) grease the bolt and expansion wedge on the stem and pack the top headset bearings; 4) insert the stem into the tube and tighten the stem bolt.

Tips on the process: 1) don't tighten the bearing races too much, just enough to hold the bearings in the cups. If you tighten the races too hard, they won't turn freely; 2) same goes for the stem bolt; it should be tight, but not so tight that it affects the steering of the bike; 3) try to line up the fork and handlebars with each other and with the frame; you can fine-tune once the bike is ridable, but the straighter everything is now, the easier it will be to make fine adjustments later.

And then, the crank. Pretty straight-forward: pack the bearings and grease the cups, lightly tighten the bearing race on the left (non-chain) side, and put the hardware back on. Again, when you tighten the nut on the outside of the left side, don't make it too tight, as this will push the bearing race into the bearings and affect the turning of the crank. Remember, the nuts and the bearing race on the crank turn counter-clockwise so they won't spin off while you're riding, so they don't have to be made too tight.

So, there you go--clear as mud, right?

Friday, 12 October 2007

Light at the End of the Tunnel

10/13-UPDATE. Arg. It's rainy and humid today--going to have to wait on that second coat of lacquer. I'm outta here for 3 weeks. See you in November!

Ah, the end is in sight! All my parts and tools for the reassembly have finally been purchased, and today I put on the first lacquer coat, or clear coat. With the exception of one area on the frame which dripped a bit, it went on really well. I had buffed out the paint to a dull matte finish as recommended before the clear coat, and I was really happy to see the clear coat bring back the gloss and deepen the color. For the buffing, most everything I read said to wet sand with extremely fine sandpaper, but that made me nervous, so I used my "0000" steel wool (dry) to do the job, and it seemed to work fine.

I'll do the second lacquer coat tomorrow (24 hours, says the can). Then, I'll be away from the project for about three weeks (got actual work to do). When I get back, the clear coat will be nice and hard and I'll buff up the finish with some car wax and start putting it all back together. We'll see if I can remember where everything goes!

PS--I'll be in Chicago for about a week coming up, and I hope to snap some photos of old bikes around the University of Chicago while I'm there to post when I get back--love to see old bikes getting used!

Monday, 1 October 2007

The Stencils Turned Out Great!

I'm actually a bit shocked at how well they worked. I was going to wait until everything was put back together to post more pictures, but they turned out so well, I had to show them off. There are some edges that need smoothing and touching up with the red paint, but all-in-all the stencils worked better than I had thought they would. I've still got to do the insides of the letters on the chain guard, but I'll do that next week when I do the red touch ups.

Here's the rear fender with the "safety" stripe on the back--wasn't on the original paint job, but I like the way it looks on some of the old English three-speeds, so I stole it.

This is the modified fork motif. It used to be just the upside-down arrow design (which had all chipped off, leaving just the outline of where it had been), and I added the star from the chain guard to give it a little more character.

And here's the chain guard sans insides of the letters. The original had two stars, but I decided to go with just one, seeing as how I already added two to the fork. This is a bike, after all, not a My Little Pony.

With the touch ups left to do next week, it's going to set me a week behind again. This means that I probably won't get the clearcoat done until early November, since I'll be away for three weeks in October. Oh well, can't rush greatness.

PS--I finally figured out how to embed photos within the text in Blogger, so that's exciting. Durr.

Sunday, 23 September 2007

Paintin' the Townie Red

I finished the last coat of red paint this afternoon! Some of the rough spots from the last coat have been smoothed out, but there are still some places I'm not completely happy with. Oh well, I'm sure nobody but me will ever notice. Now I'll wait five days (as per instructions on the can), and then do the white paint, including stencils. Then another five days before the clear coat. Then the painting will finally be done. I'm holding off on posting pictures for now, just to heighten the suspense for when the "after" pictures are ready.

Wednesday, 19 September 2007

To Paint or Not to Paint?

Well, obviously, I've chosen the former, but in the process of researching how to paint a bike, I've come across a lot of old bike people arguing that one should NEVER re-paint an old bicycle, so I thought I would offer my thoughts on the subject. The people who argue against painting (or at least painting it yourself) seem to be the collectors and aficionados--the ones who horde bikes in the garage and periodically set them all up in the driveway to look at them. They also seem to be the ones who derive much of their self-worth from flaunting their superior knowledge on various online discussion boards.

Their argument is this: there is only one "original" coat of paint, and if you strip it off or cover it up, you devalue the bike. I can see the point for rare and unique models, or especially antique bikes, but for the mass-produced late-model older bikes, I don't really get it. It's like an old house; you don't keep the original paint on the house, right? You repaint it, and sometimes frequently. Doing so protects the house and makes it looks better. And why hire a painter when paint and brushes are readily available? You save money and get the satisfaction of doing the job yourself.

My wife is a rare book librarian and I'm a historian, so believe me, I appreciate the value of a pristine historical artifact, but many old bikes are not historical artifacts. They are working machines that should be used and enjoyed. If a new coat of paint (done right and done yourself) is what it takes to enjoy your old bike that much more, then I say go for it!

And speaking of paint, I think I'm going to put on the last coat of red today. I'll update when and if I get it done.

Ping Blog

Step 1
Blog URL:


Blog Title (optional):


Blog RSS Feed (optional):


I agree with terms of service.

Step 2
Copy the following code and put it on your blog/site to help our blog ping tool track your submission (Need help?):
;

 
Design by Free WordPress Themes | Bloggerized by Lasantha - Premium Blogger Themes | Best Buy Coupons